Building an Augmented Reality Web Map
During NACIS 2020, I presented Using Augmented Reality to Communicate Climate Change Pressure on Vancouver Island Marmot Habitat, my capstone project for the Penn State Master of GIS program.
Learn more about the project and test it yourself.
Below is a step-by-step guide to creating an augmented reality web map. Click on any of the screenshots for a larger view.
This guide uses QGIS, Blender and the BlenderGIS plugin, Photoshop, and Xcode on macOS. You could likely use ArcGIS or other GIS software, and replace the step in Photoshop with GDAL or other image manipulation software, for example. I am not aware of a substitute for Xcode, where we convert the scene to a mobile USDZ file, although one may certainly exist.
Prepare Your DEM

I’ve loaded a large digital elevation model into QGIS. I then created a polygon to use as a clipping mask, which will be the extent of the 3D model. I clip the DEM to my polygon and make sure to export that as a GeoTIFF with the same target coordinate reference system which I’ll use for all of my files.
Prepare Your Map
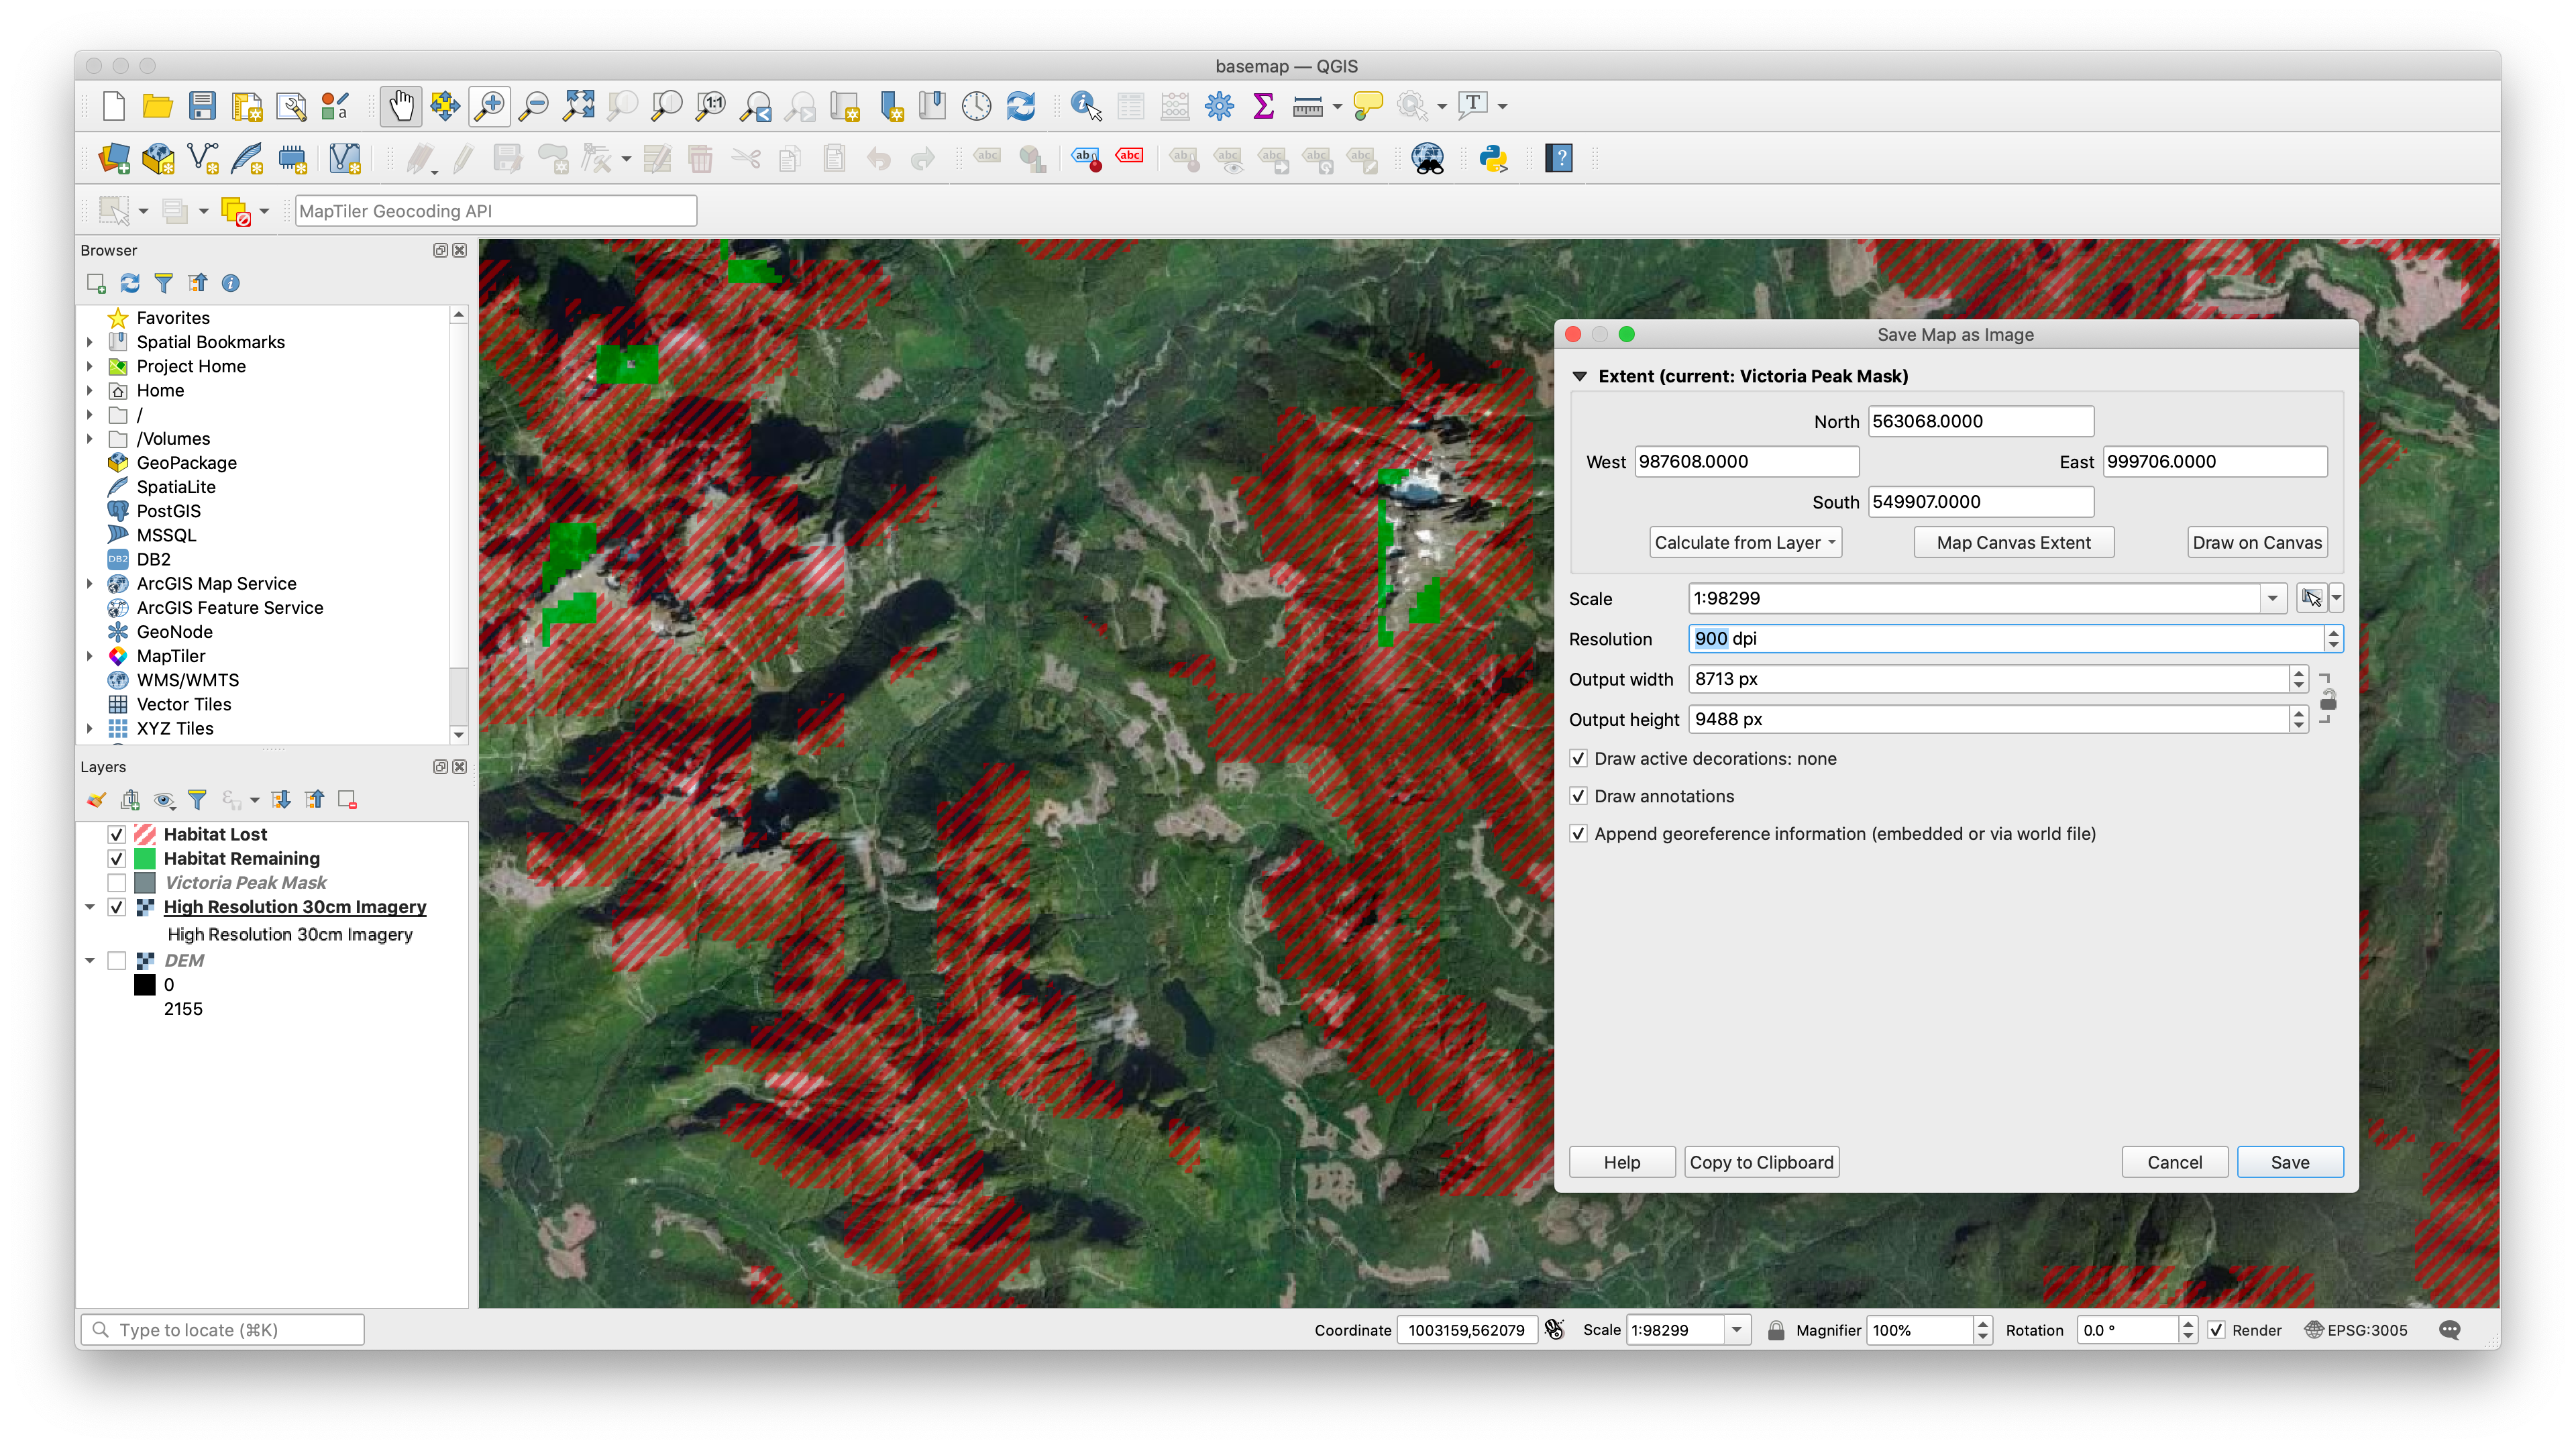
Next I need to save my map which will drape over the 3D model as a single GeoTIFF. You can see here I’m using satellite imagery as a basemap and have symbolized marmot habitat layers with some transparency, the habitat projected to be lost in a striped red and the remaining habitat in bright green. I used the mask layer as the extent and increased the resolution of the exported file to make sure there is plenty of detail in the imagery. This is a balancing act between file sizes and detail, of course.
Clip the Map TIFF
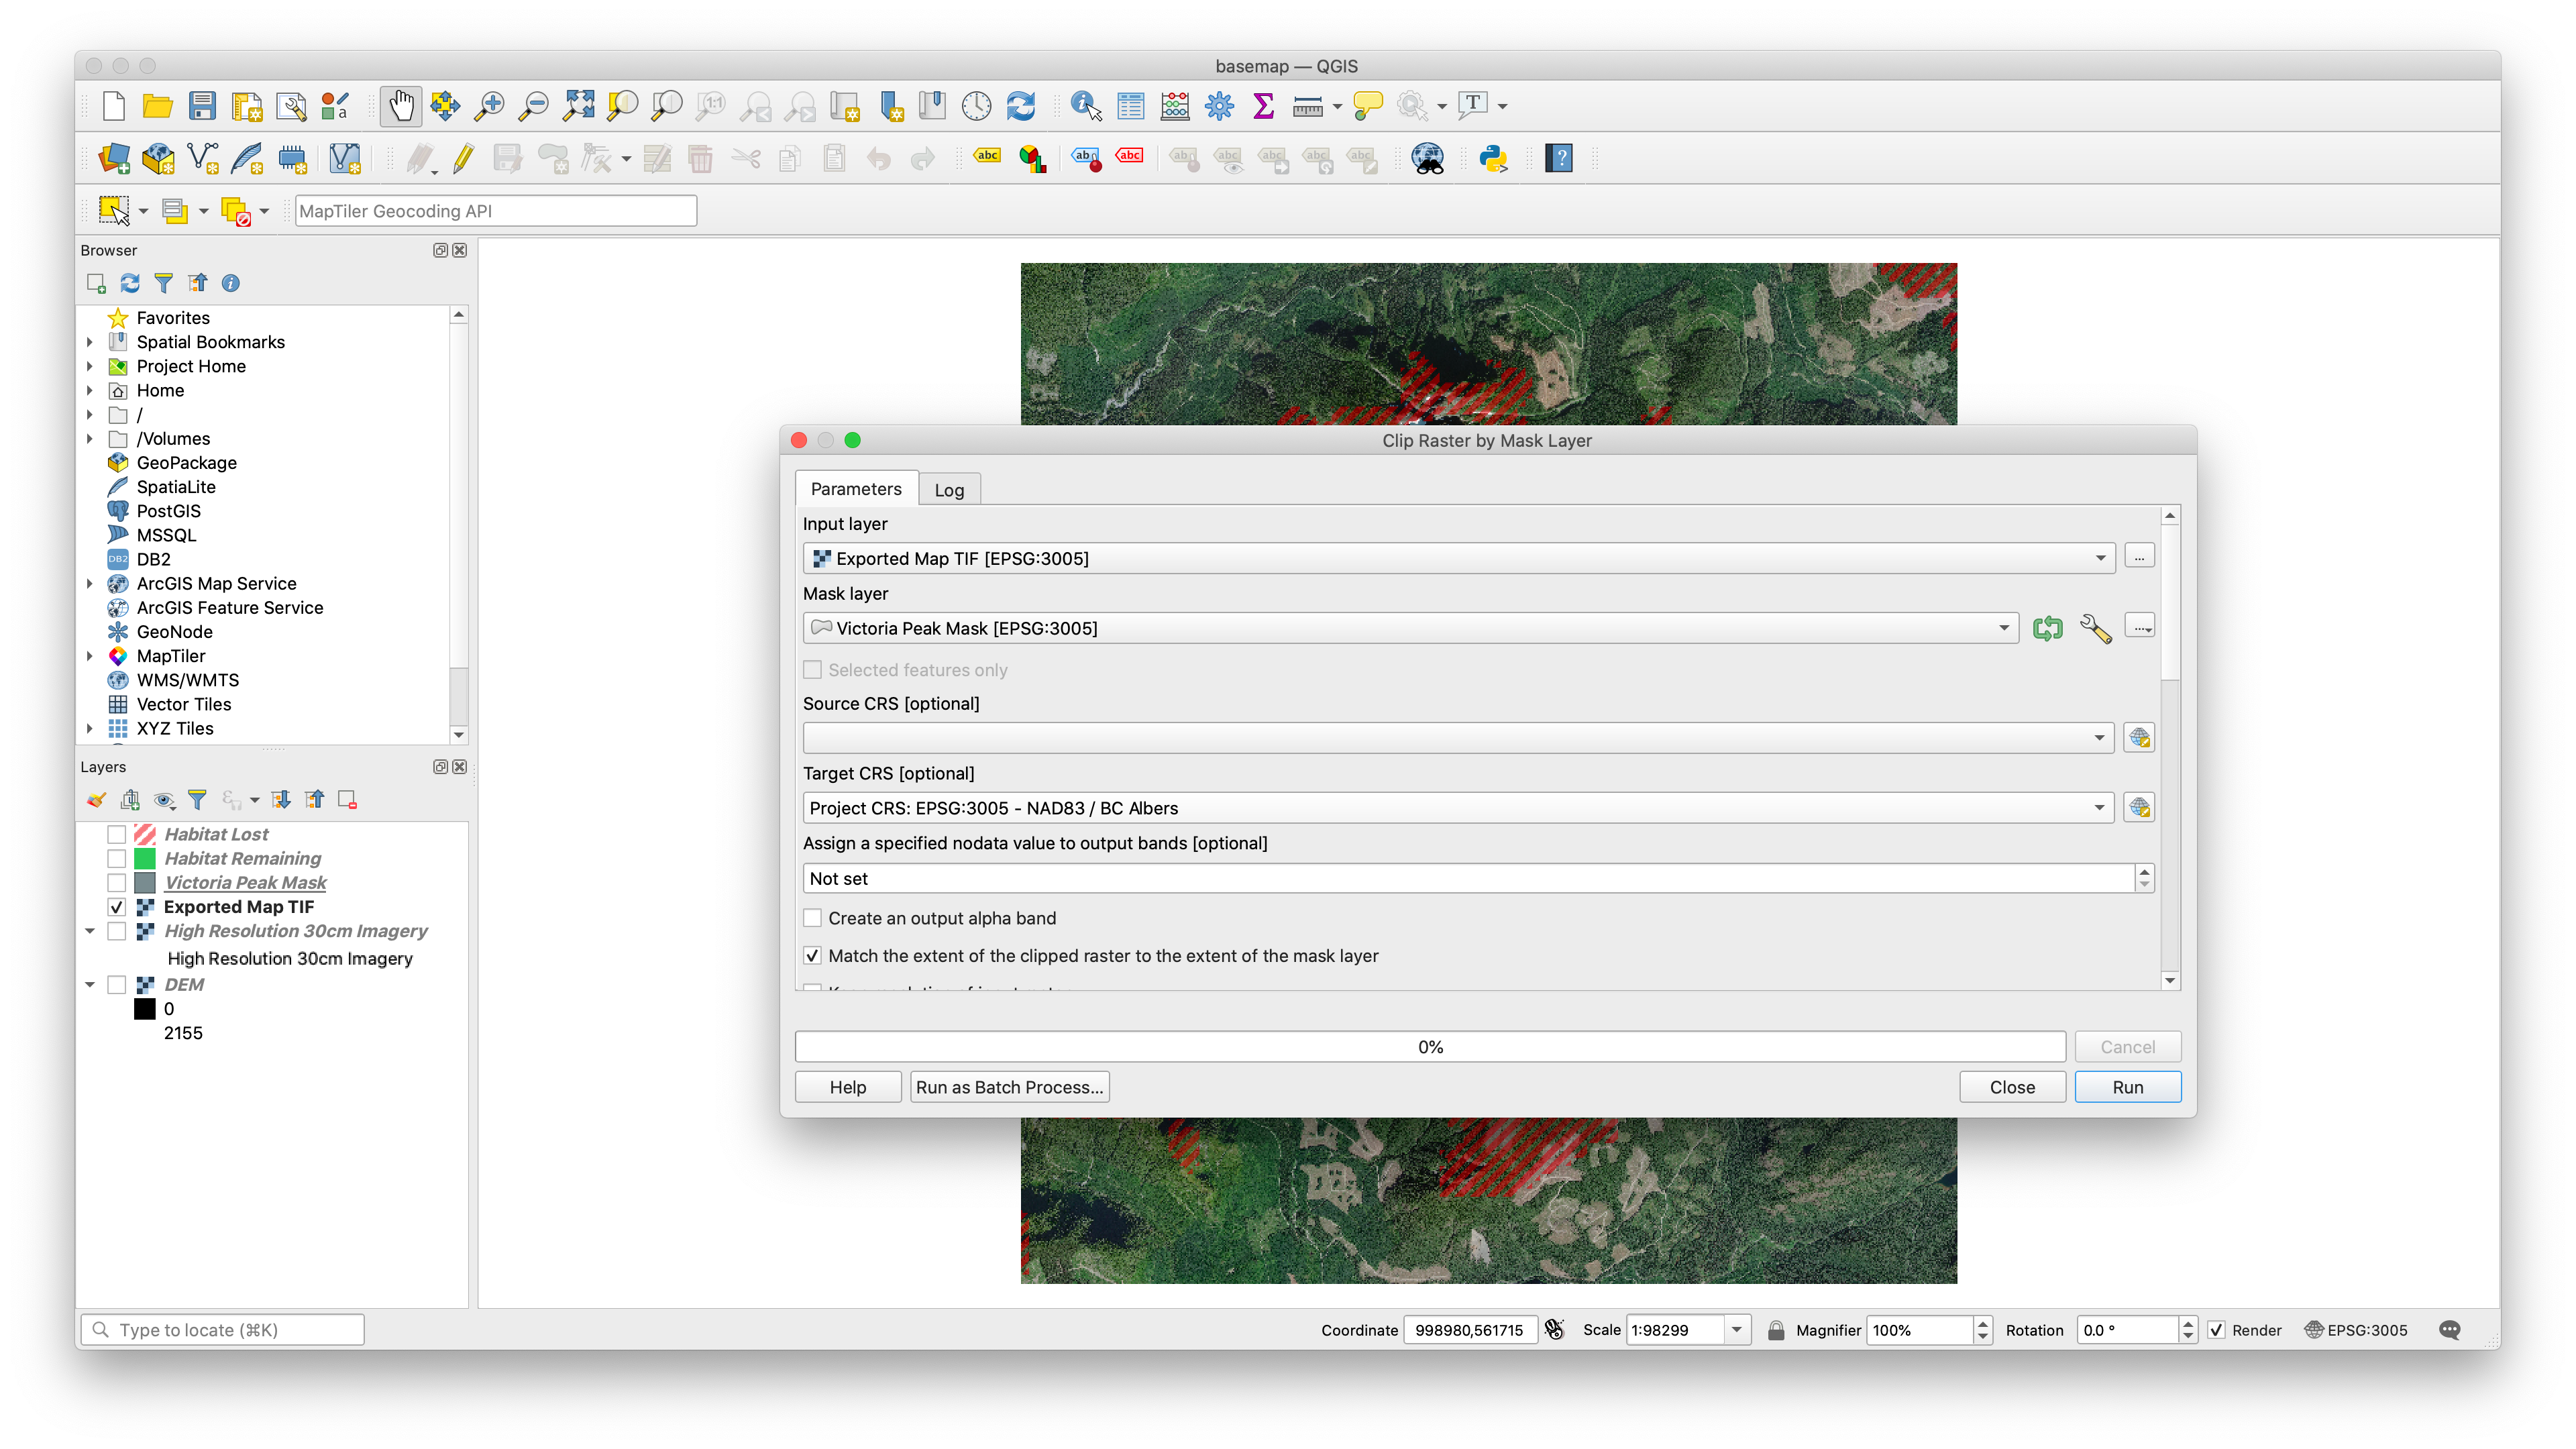
Because these GeoTIFF files are huge, I’m going to trim off any bit of extra that I can, clipping the newly exported map image by that same mask polygon.
Two Clipped TIFFs
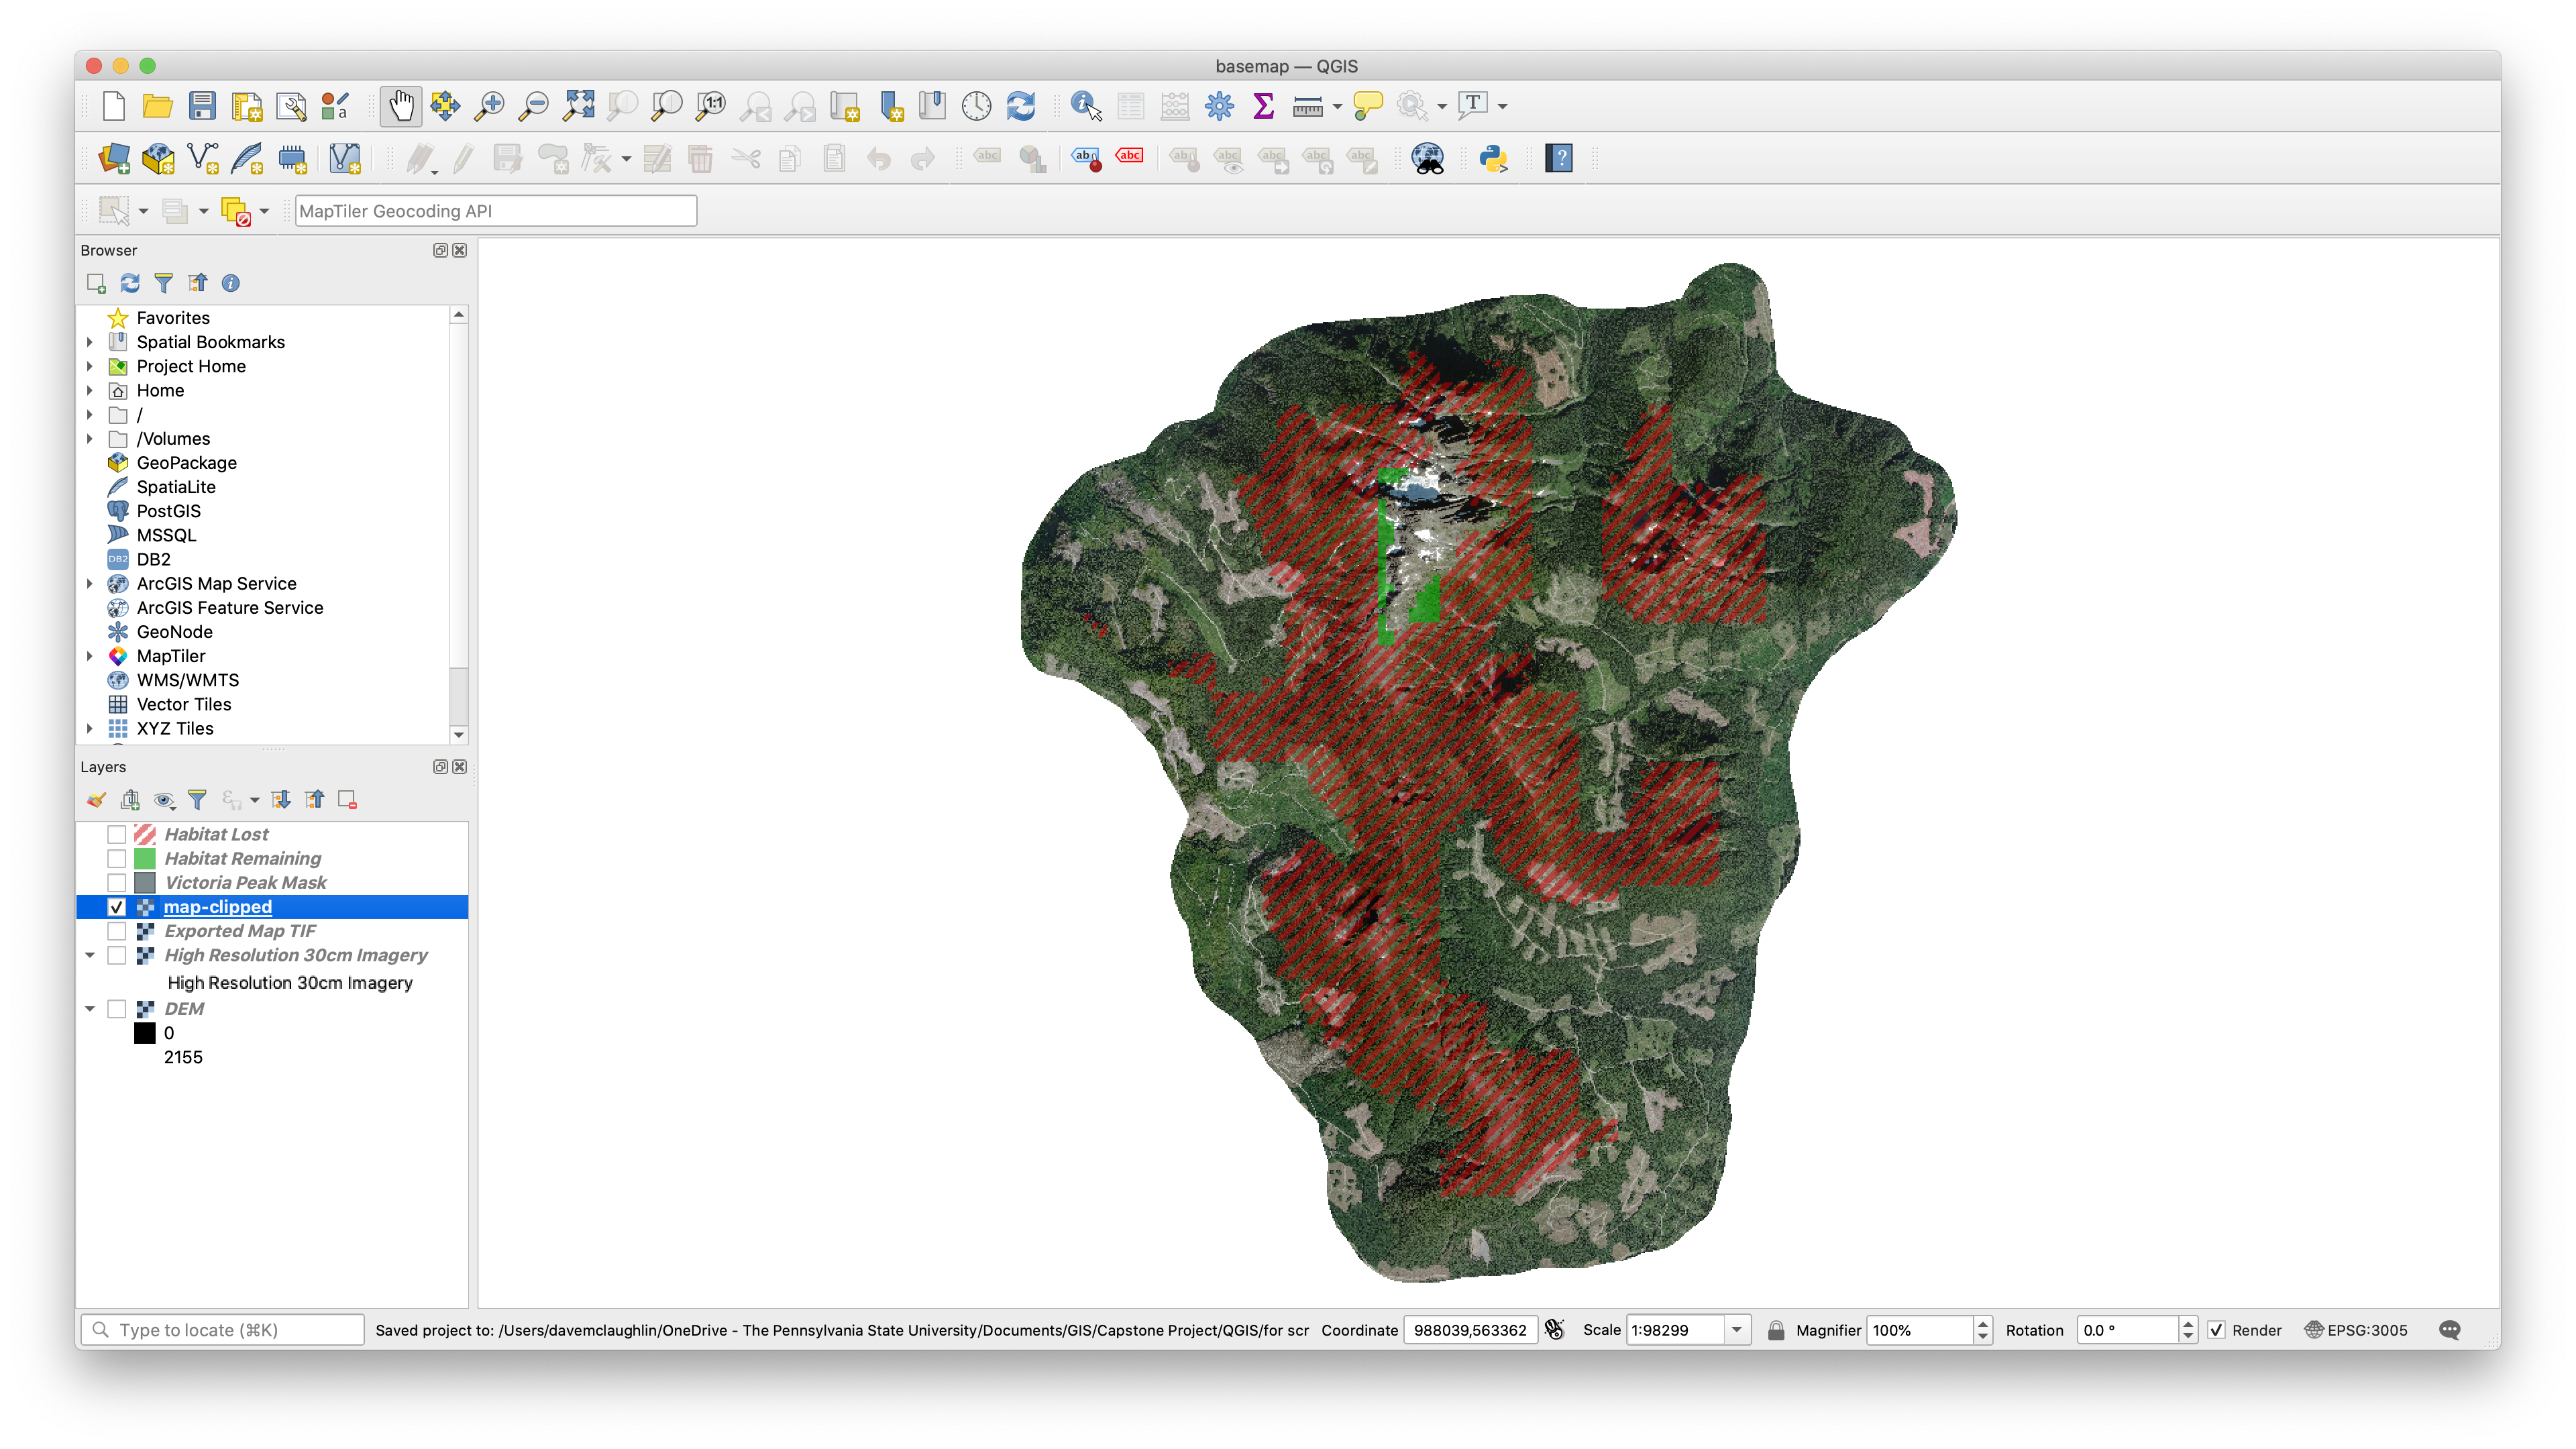
That leaves us with two clipped TIFs that we’re going to use to make the 3D model in the next step.
Importing into Blender with BlenderGIS
Now I move into Blender, a popular free and open source 3D modeling software. Key to making everything work, especially for someone new to working with geospatial data in 3D (like me), is the BlenderGIS plugin. Follow the BlenderGIS instructions to get it installed, and then you’re ready to go.
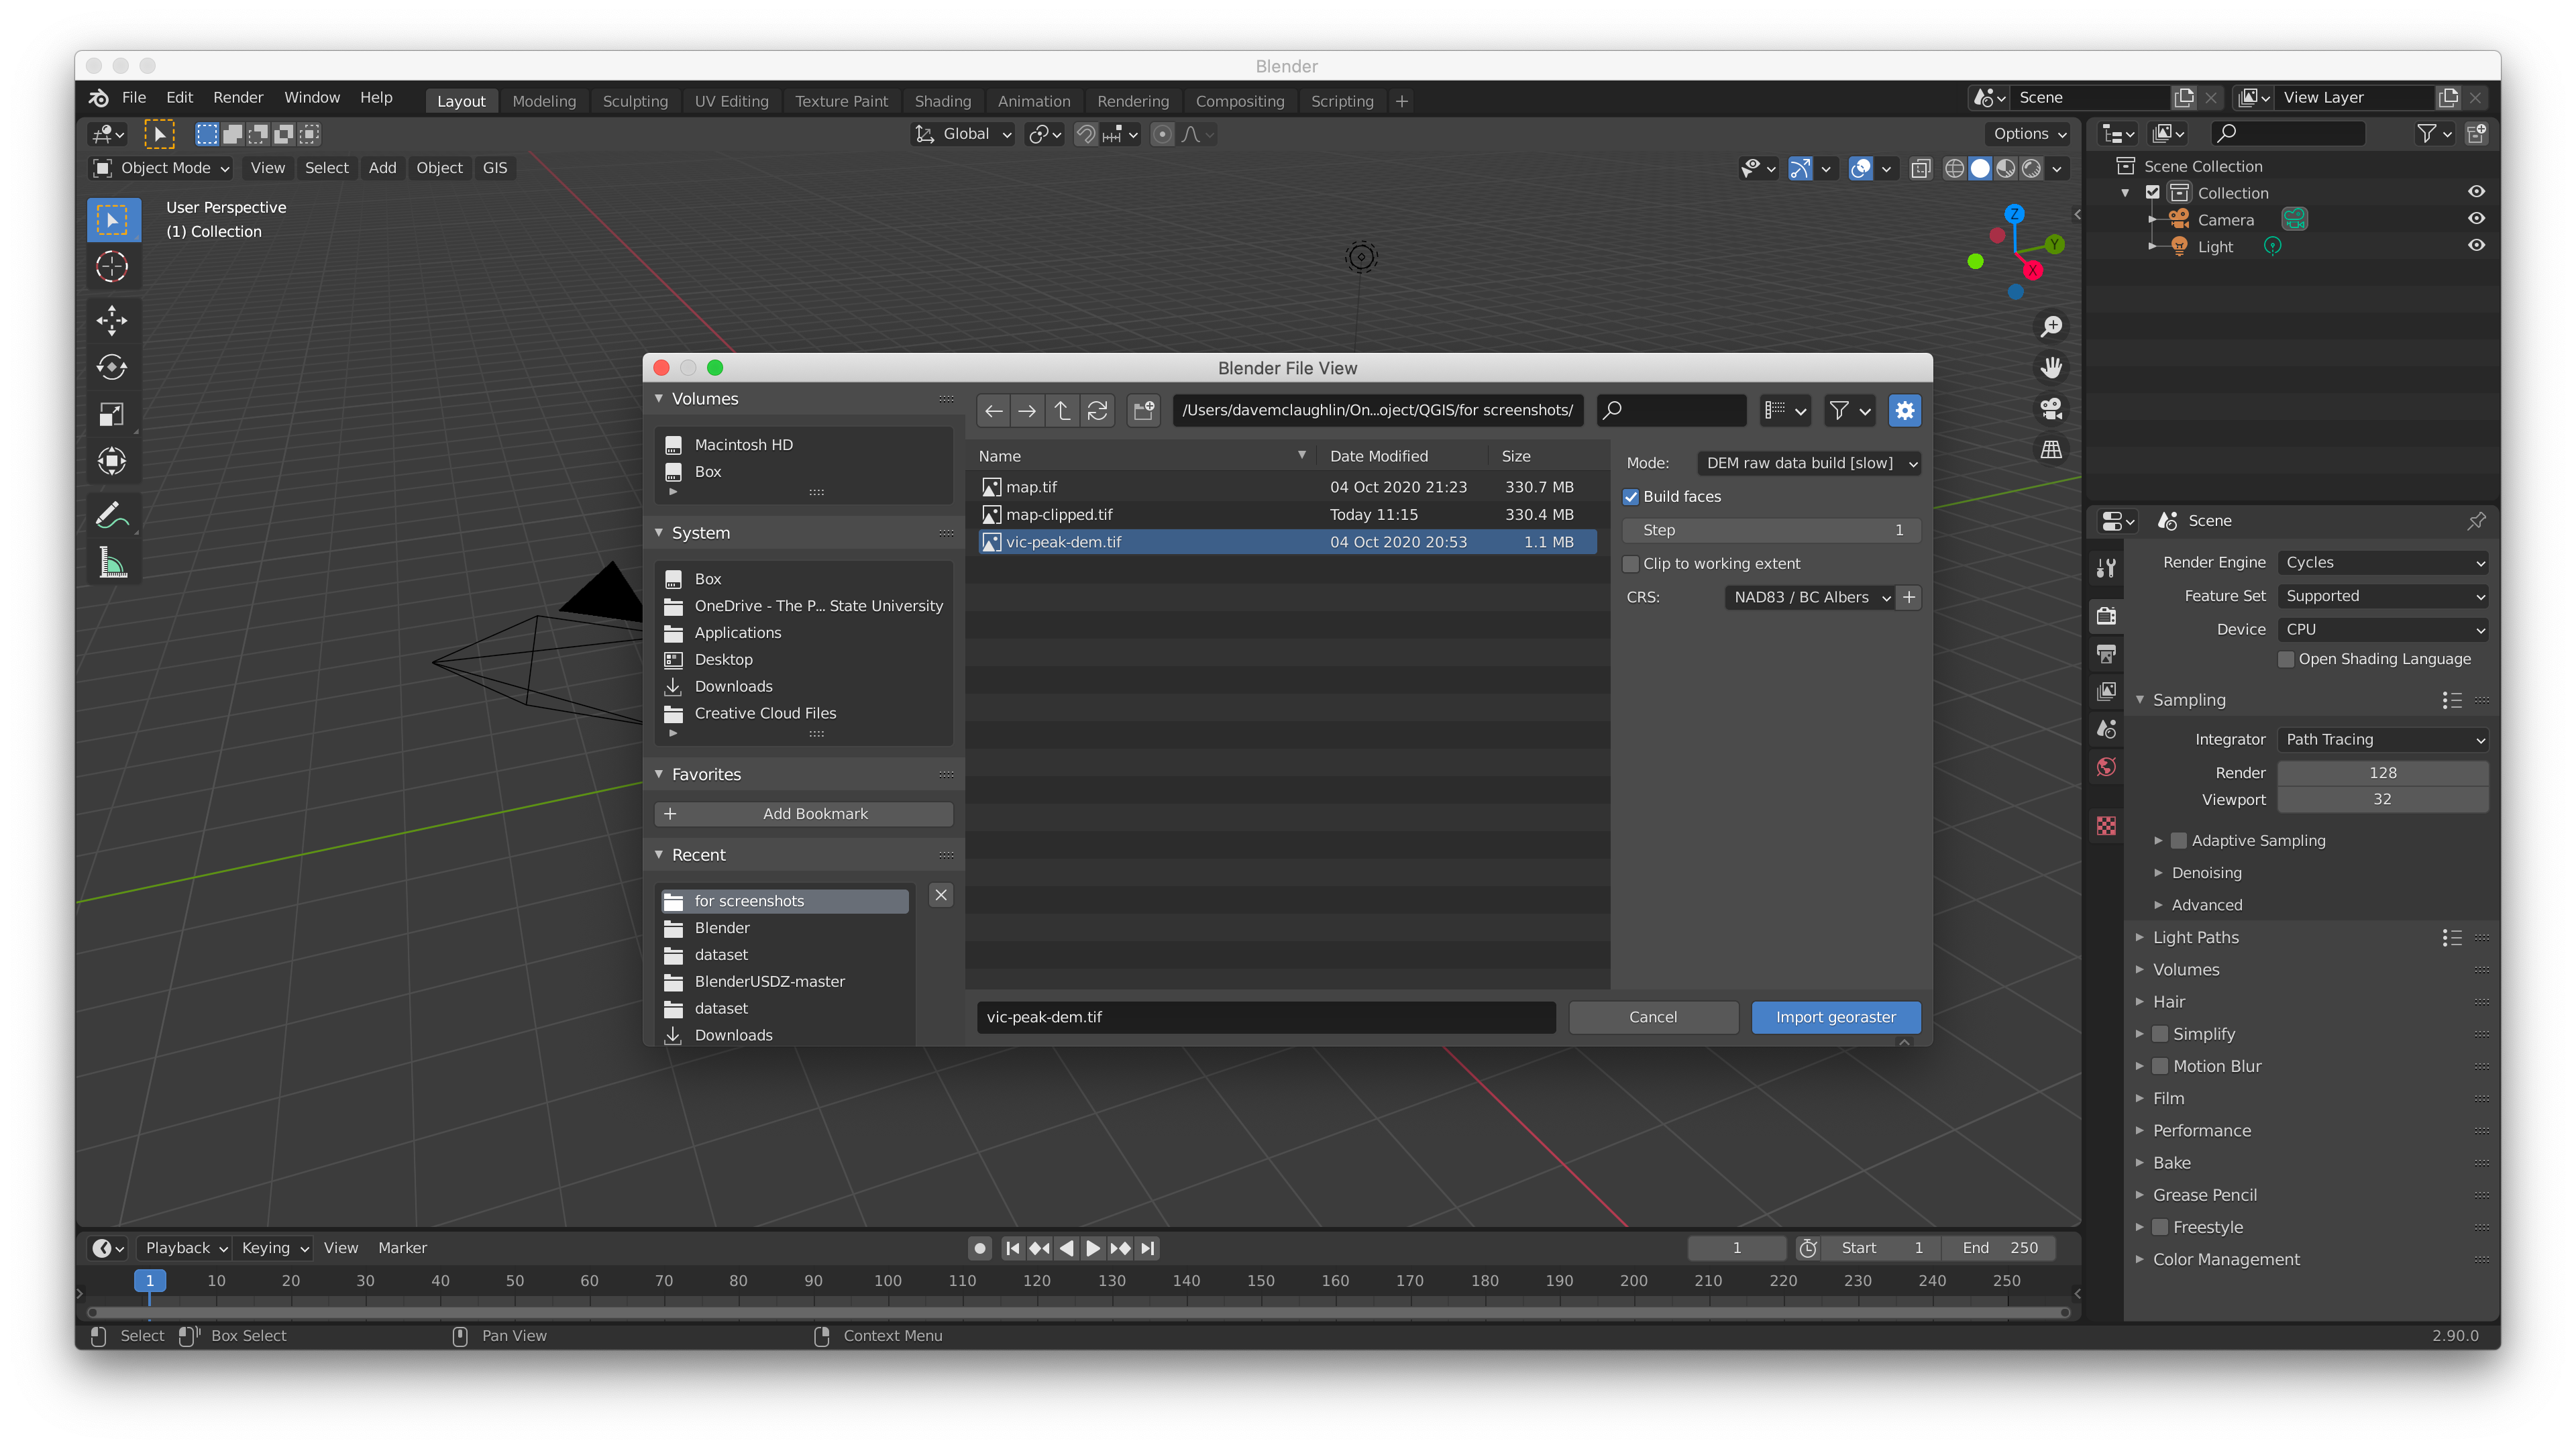
The first step in Blender is to use the BlenderGIS plugin (click the GIS button at the top left of the viewport) to import the DEM as a raw data build, which creates the 3D mesh.
First Look at the Model
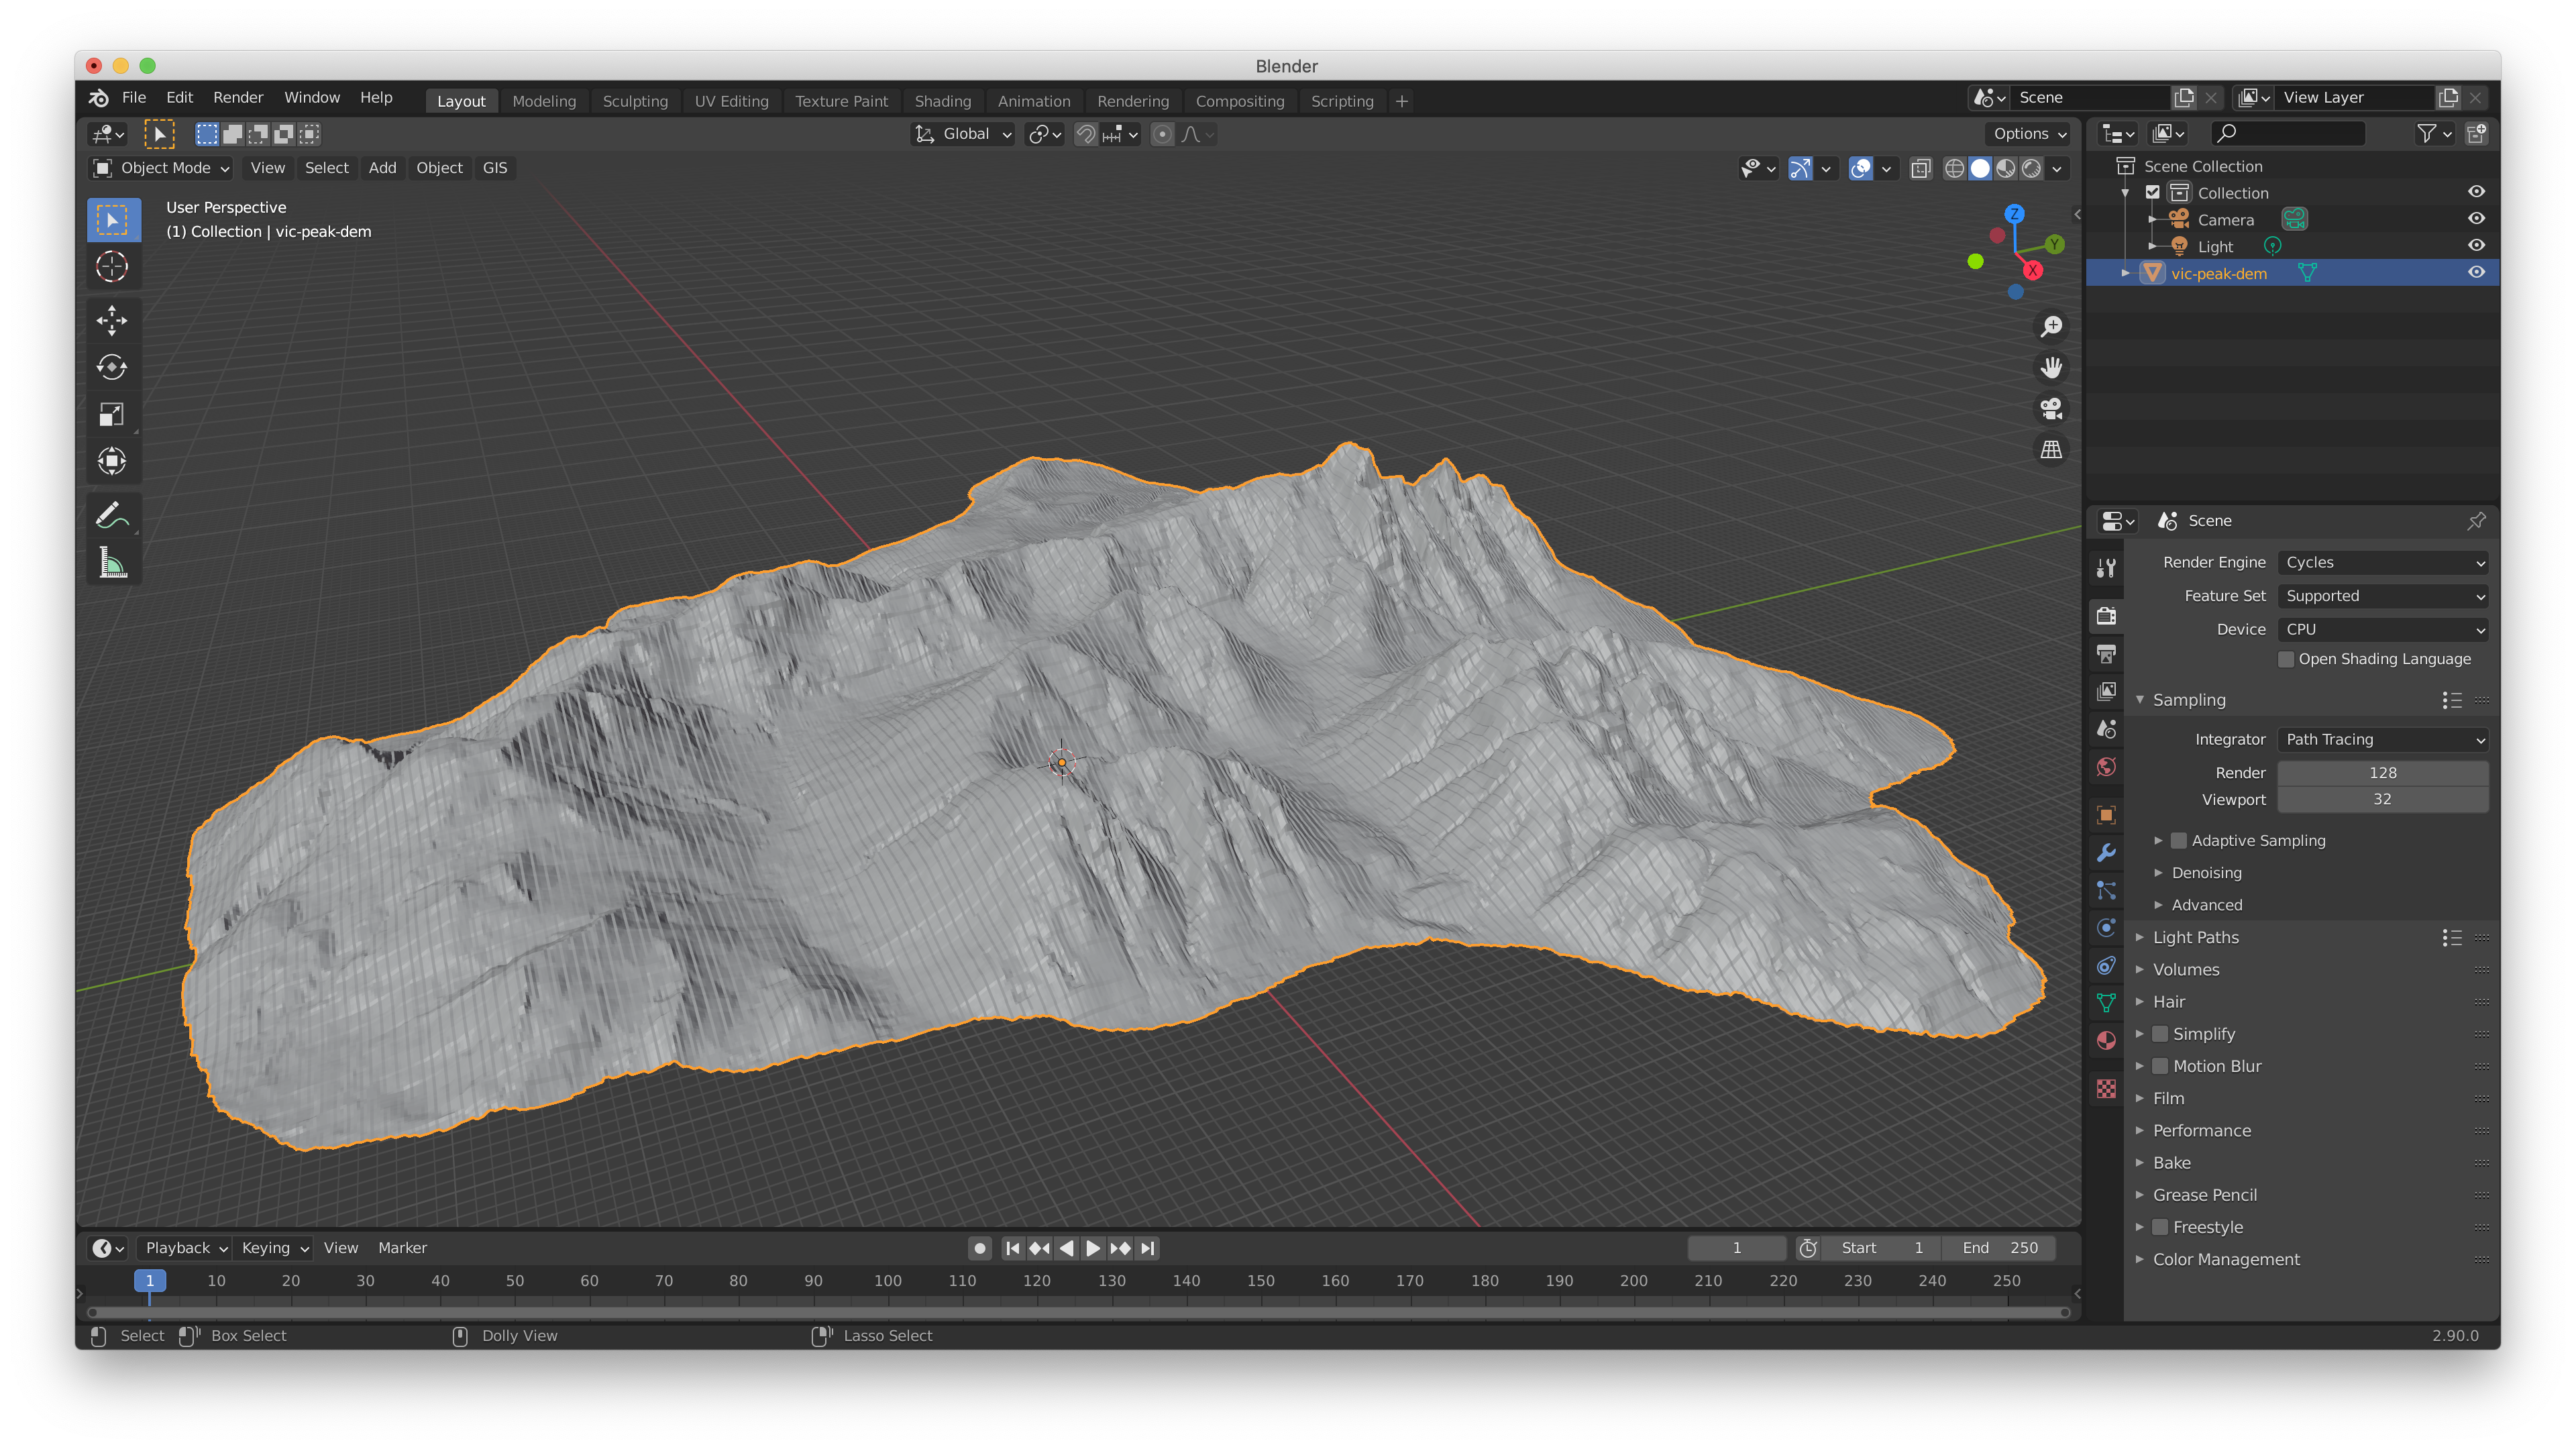
This can take a bit of time to process, but this is what you end up with. Depending on a number of factors, like the resolution of your DEM, the mesh might have some visible banding like you see here.
Smoothing
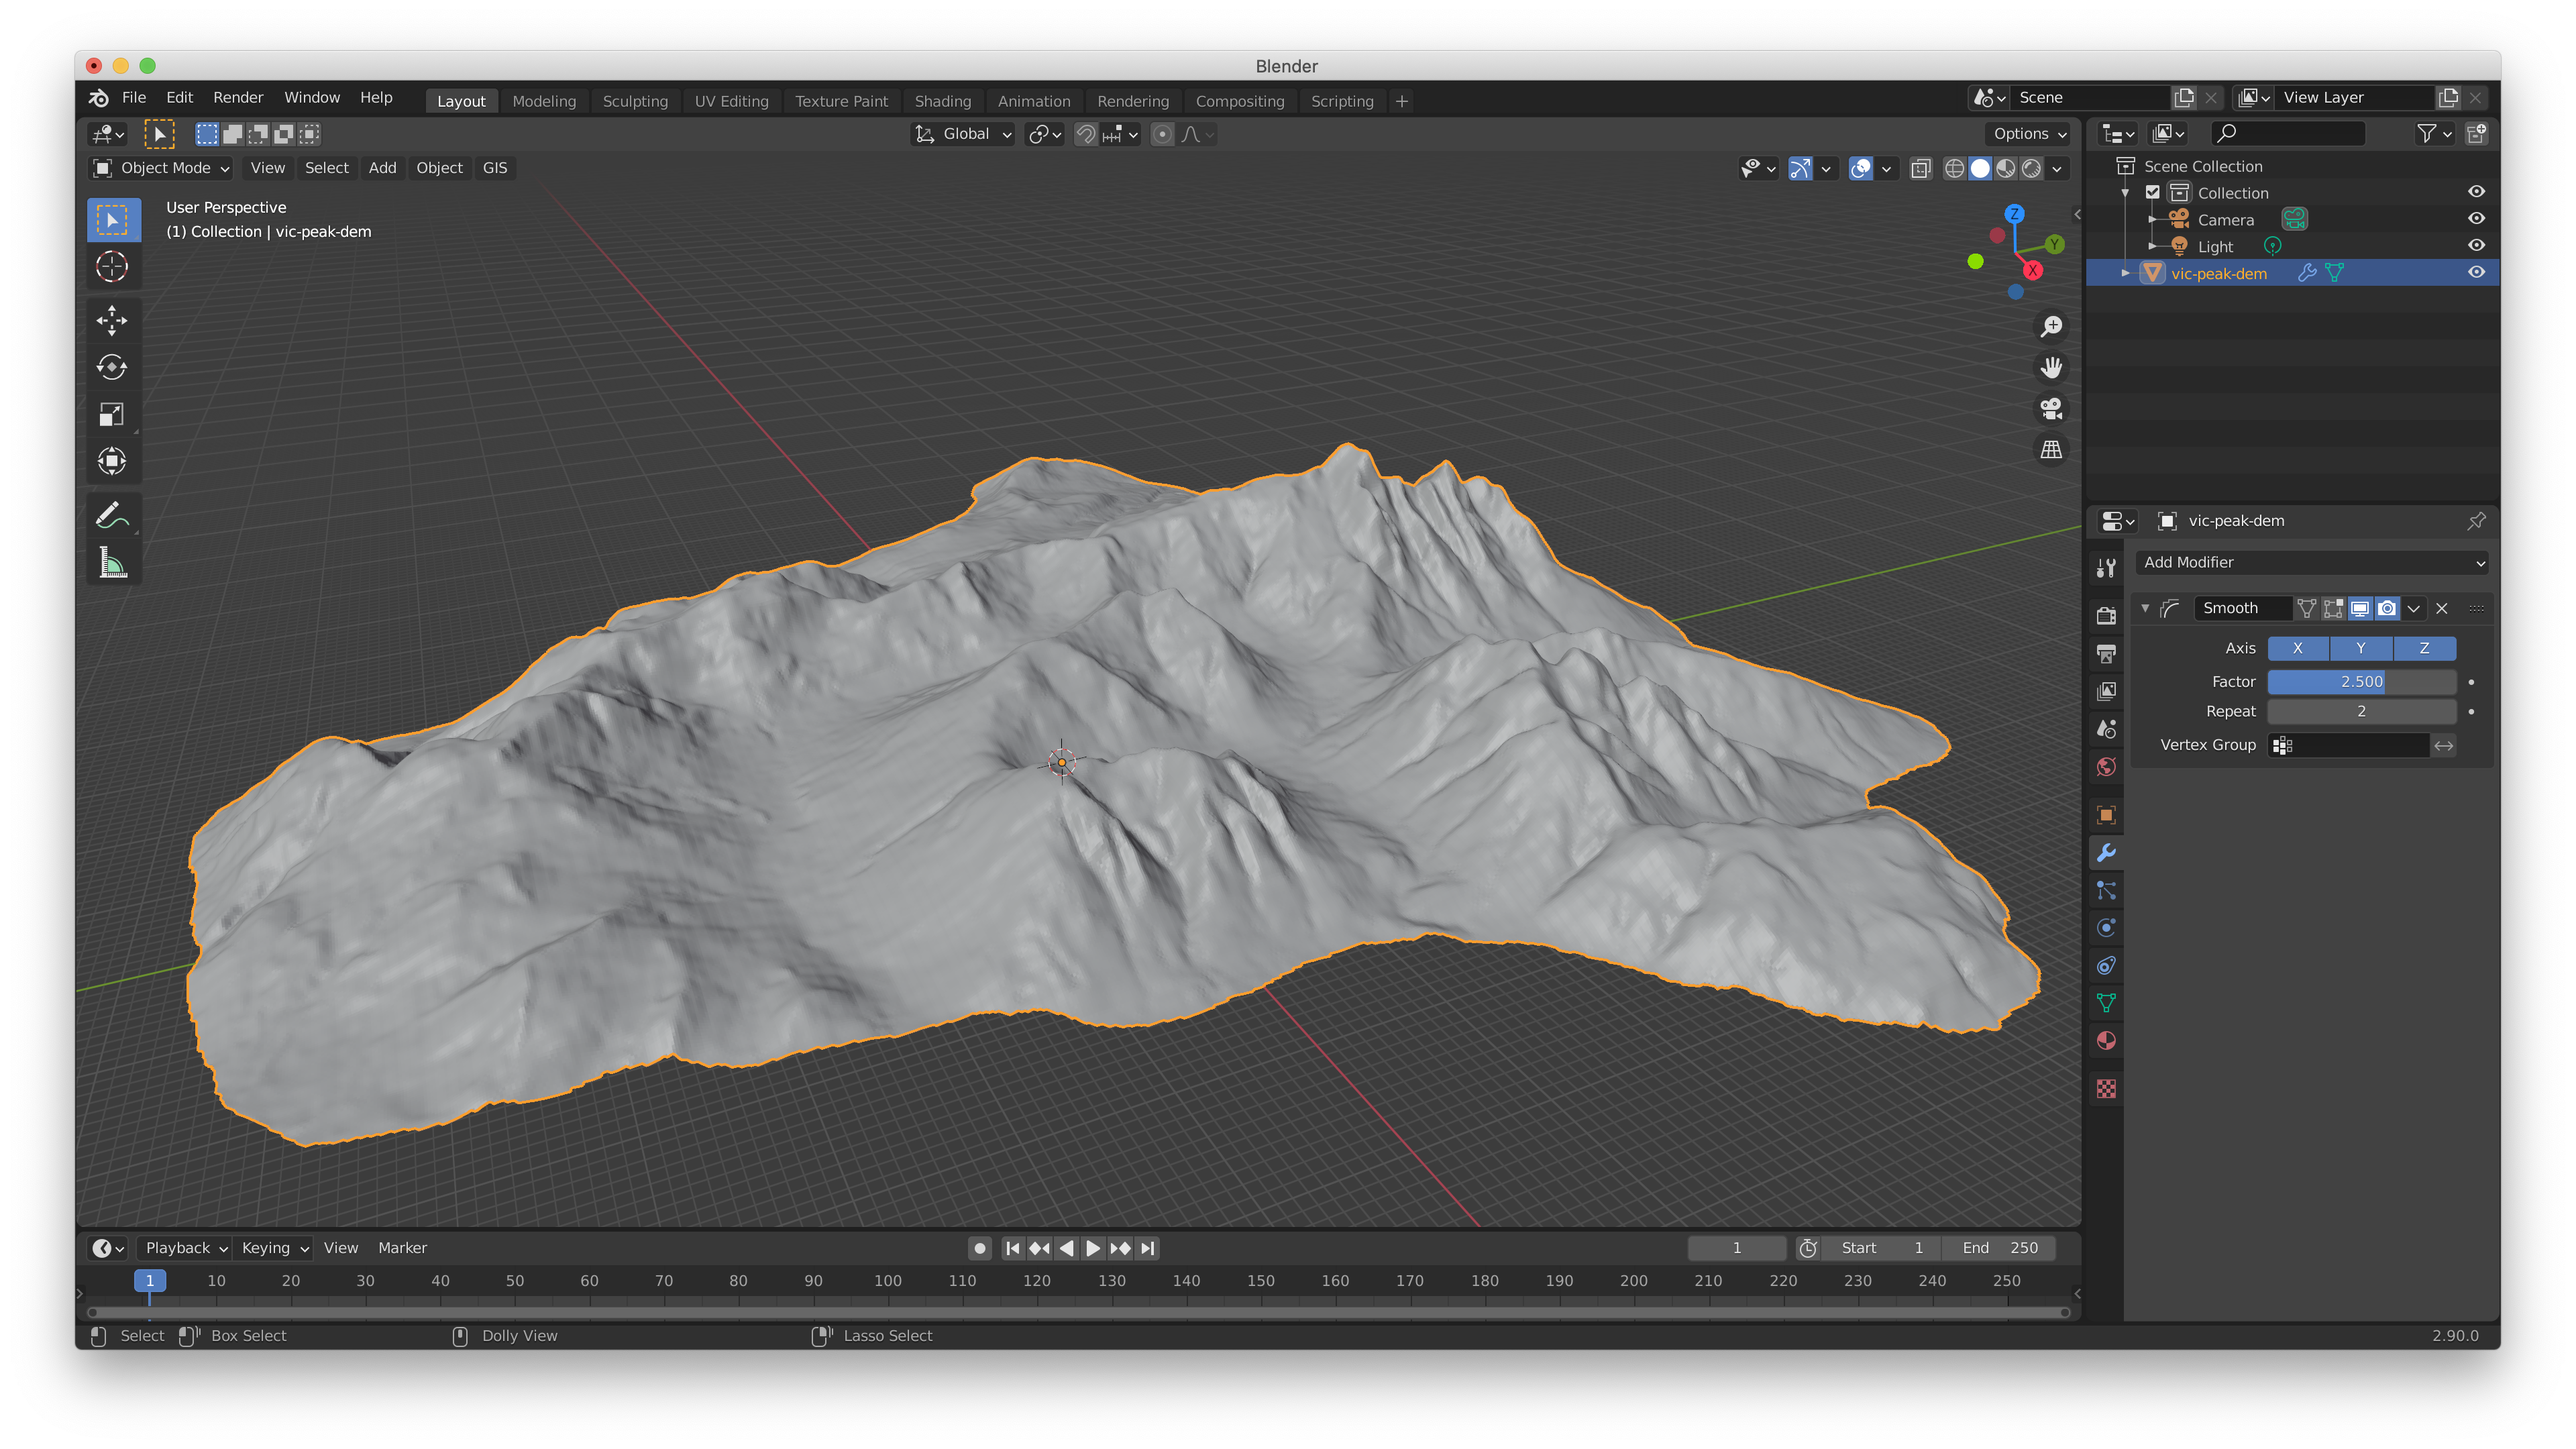
It’s probably a good idea to smooth the model at least a little. You could also choose to use the Decimate modifier (with the un-subdivide setting) at this step in the process to reduce the number of points in the mesh for big file size savings.
Importing Our Map onto the Model
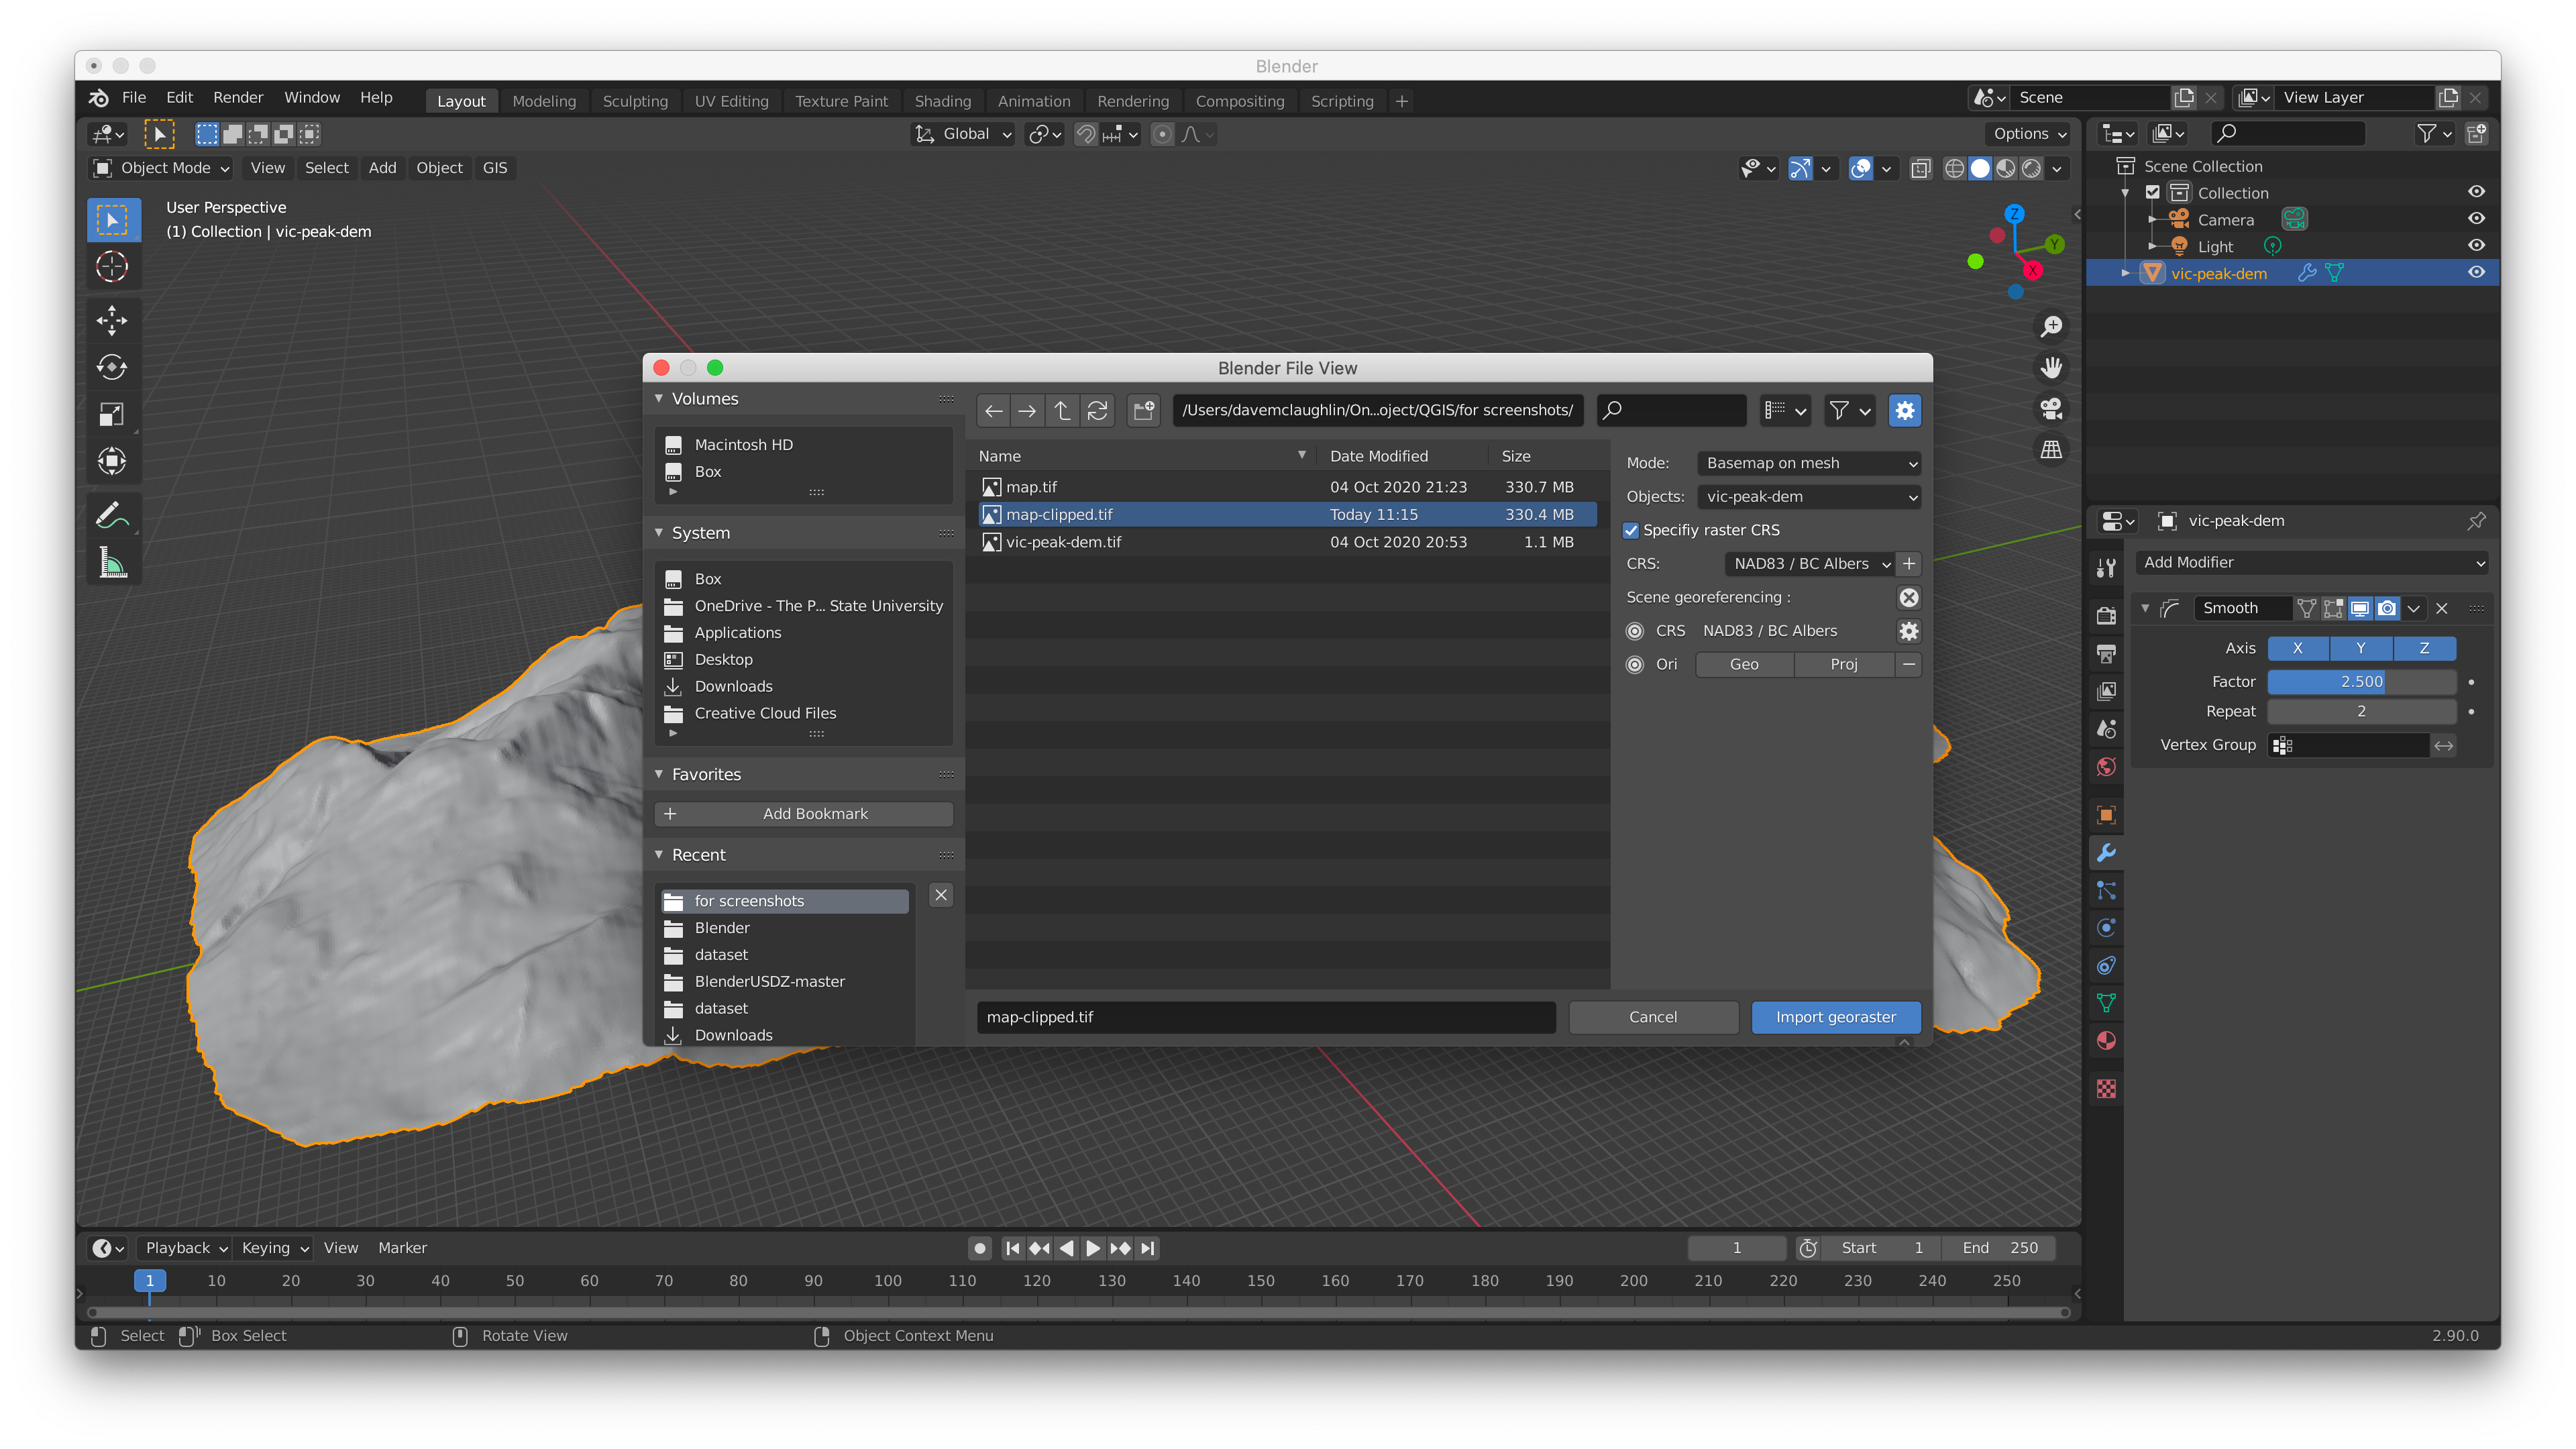
Now that we have our 3D mesh ready to go, it’s time to import our map georaster on top of the mesh, again using the Blender GIS plugin.
Imported Map
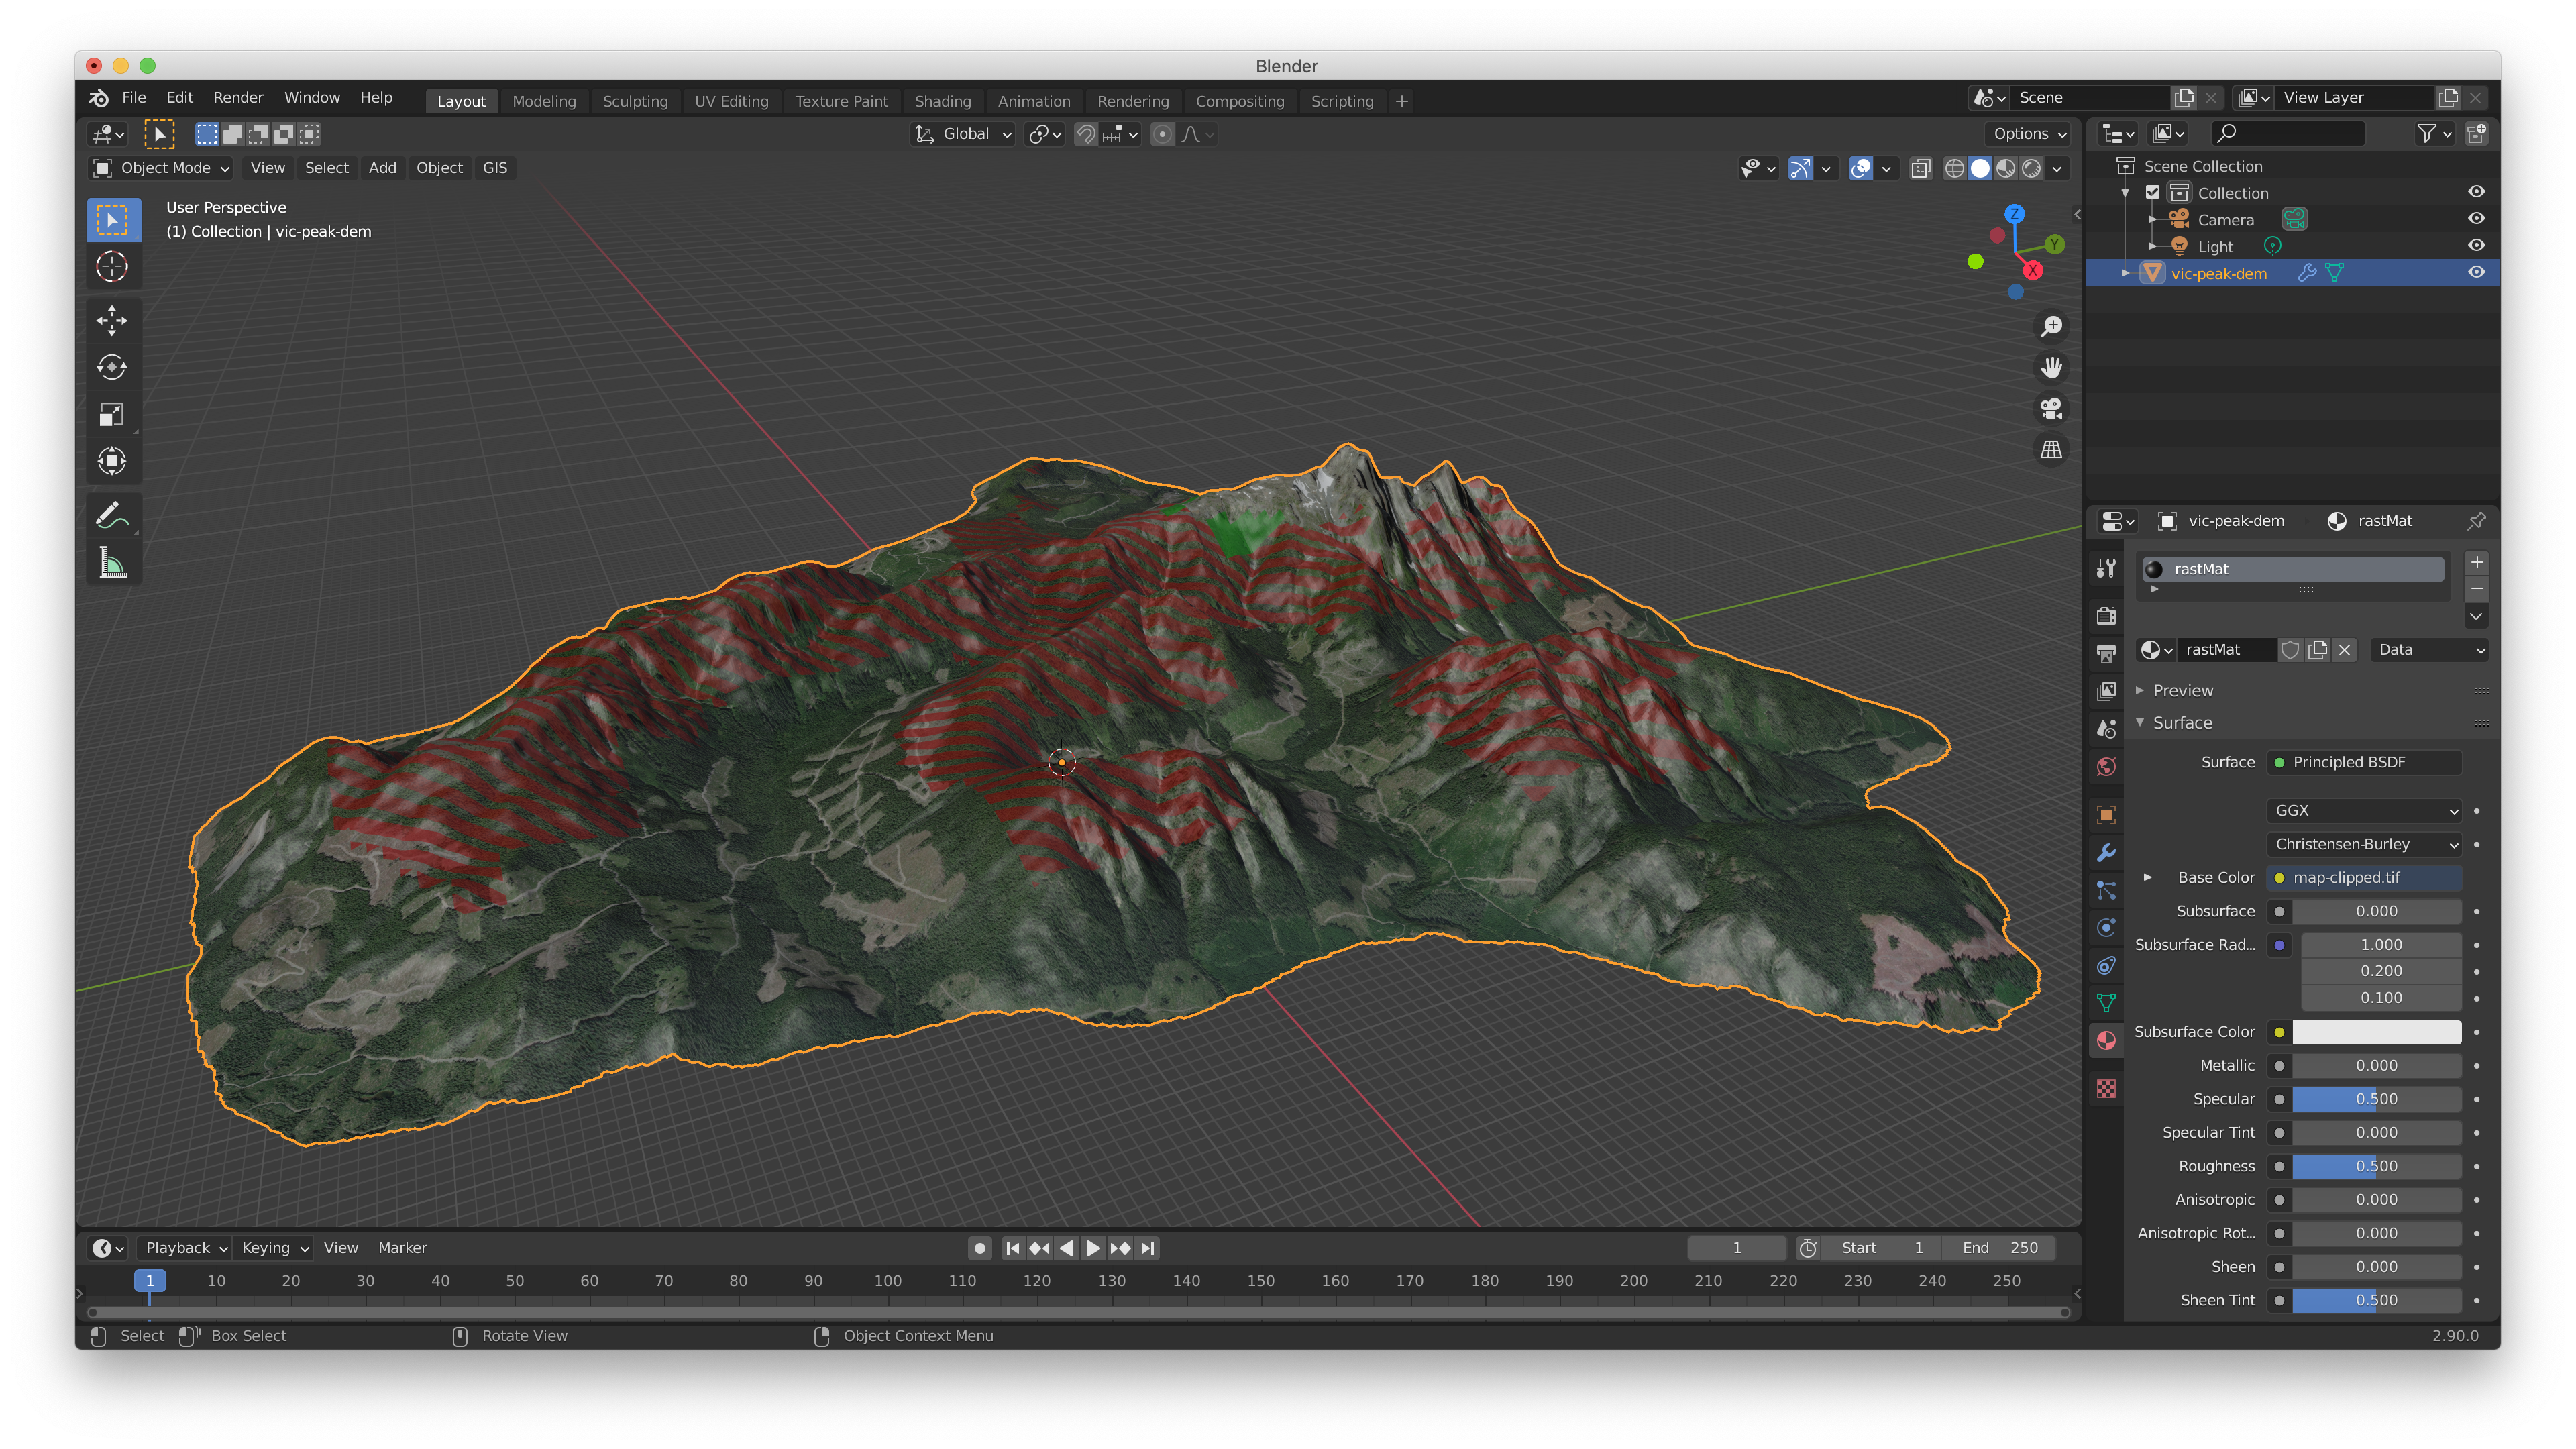
BlenderGIS uses the map as a custom material for the surface of the model and we’re getting closer to a finished product.
Scaling in Blender
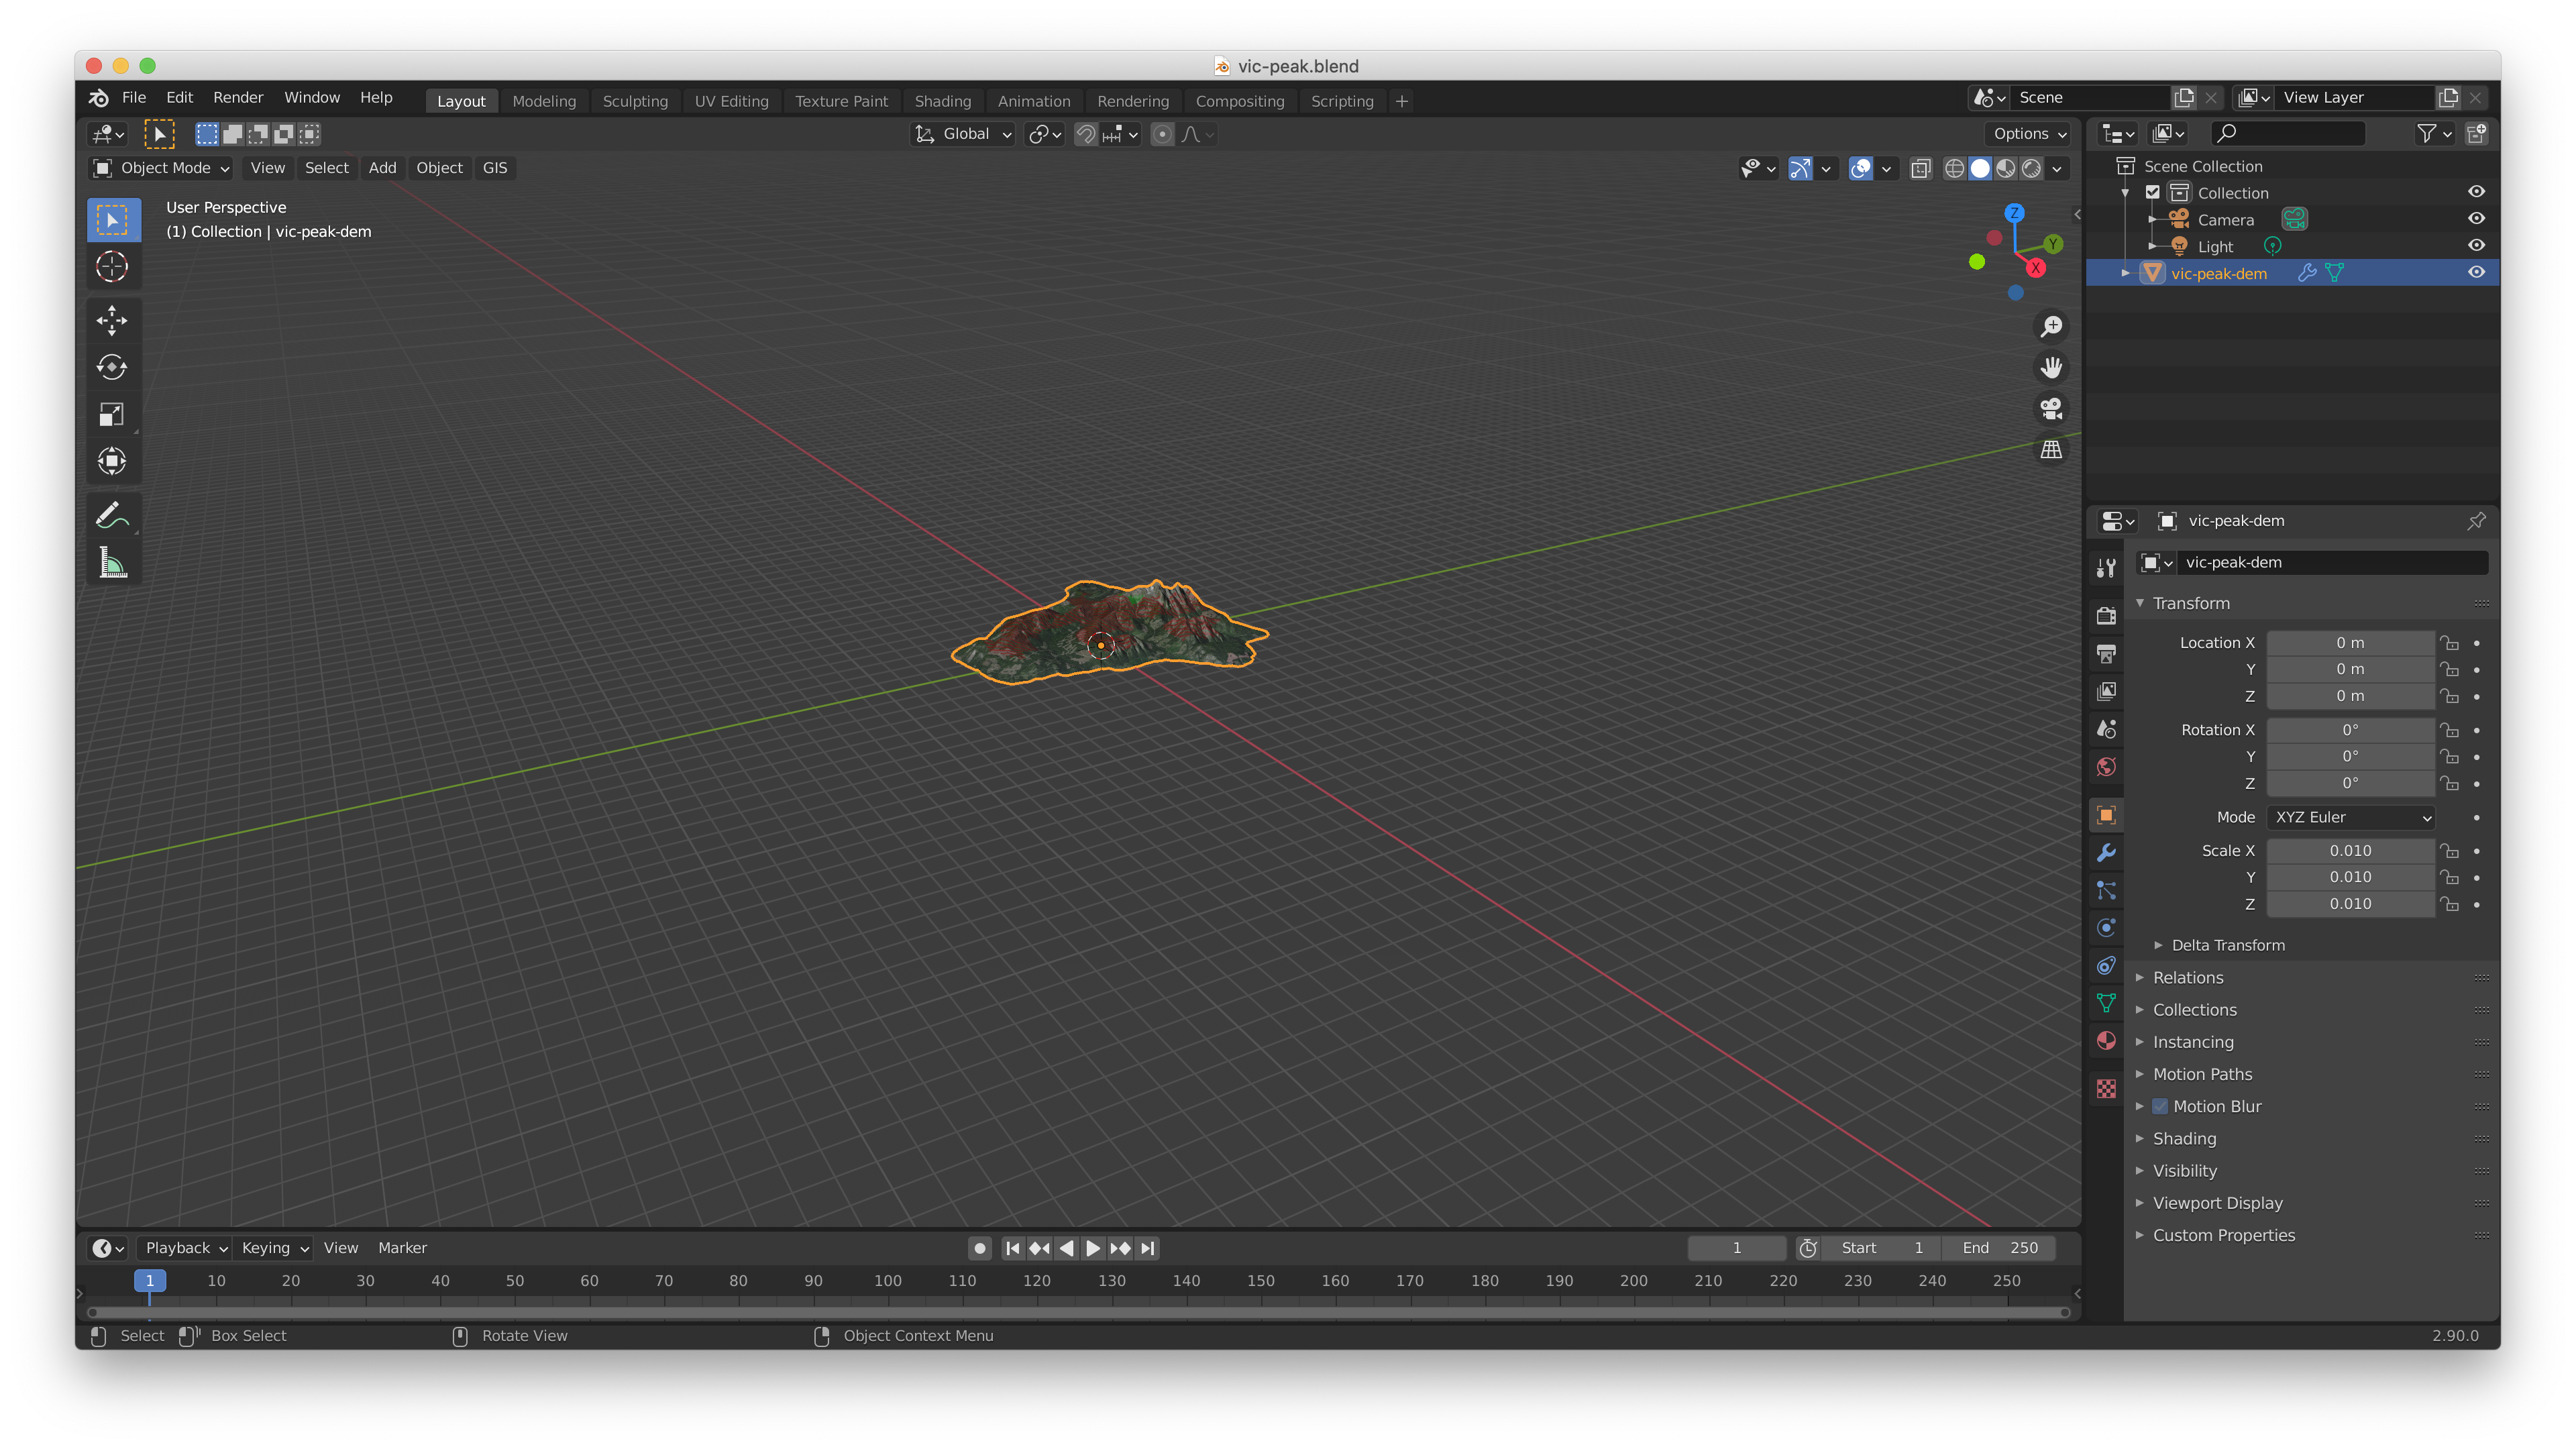
My last step in Blender before exporting is to scale the model down a good bit, to get its dimensions relative to the real world more manageable for when we display this in AR. In this example I also do more scaling in Xcode, but liked the flexibility of breaking it into two steps so I could make fine adjustments later. Your mileage may vary!
Exporting a USD from Blender
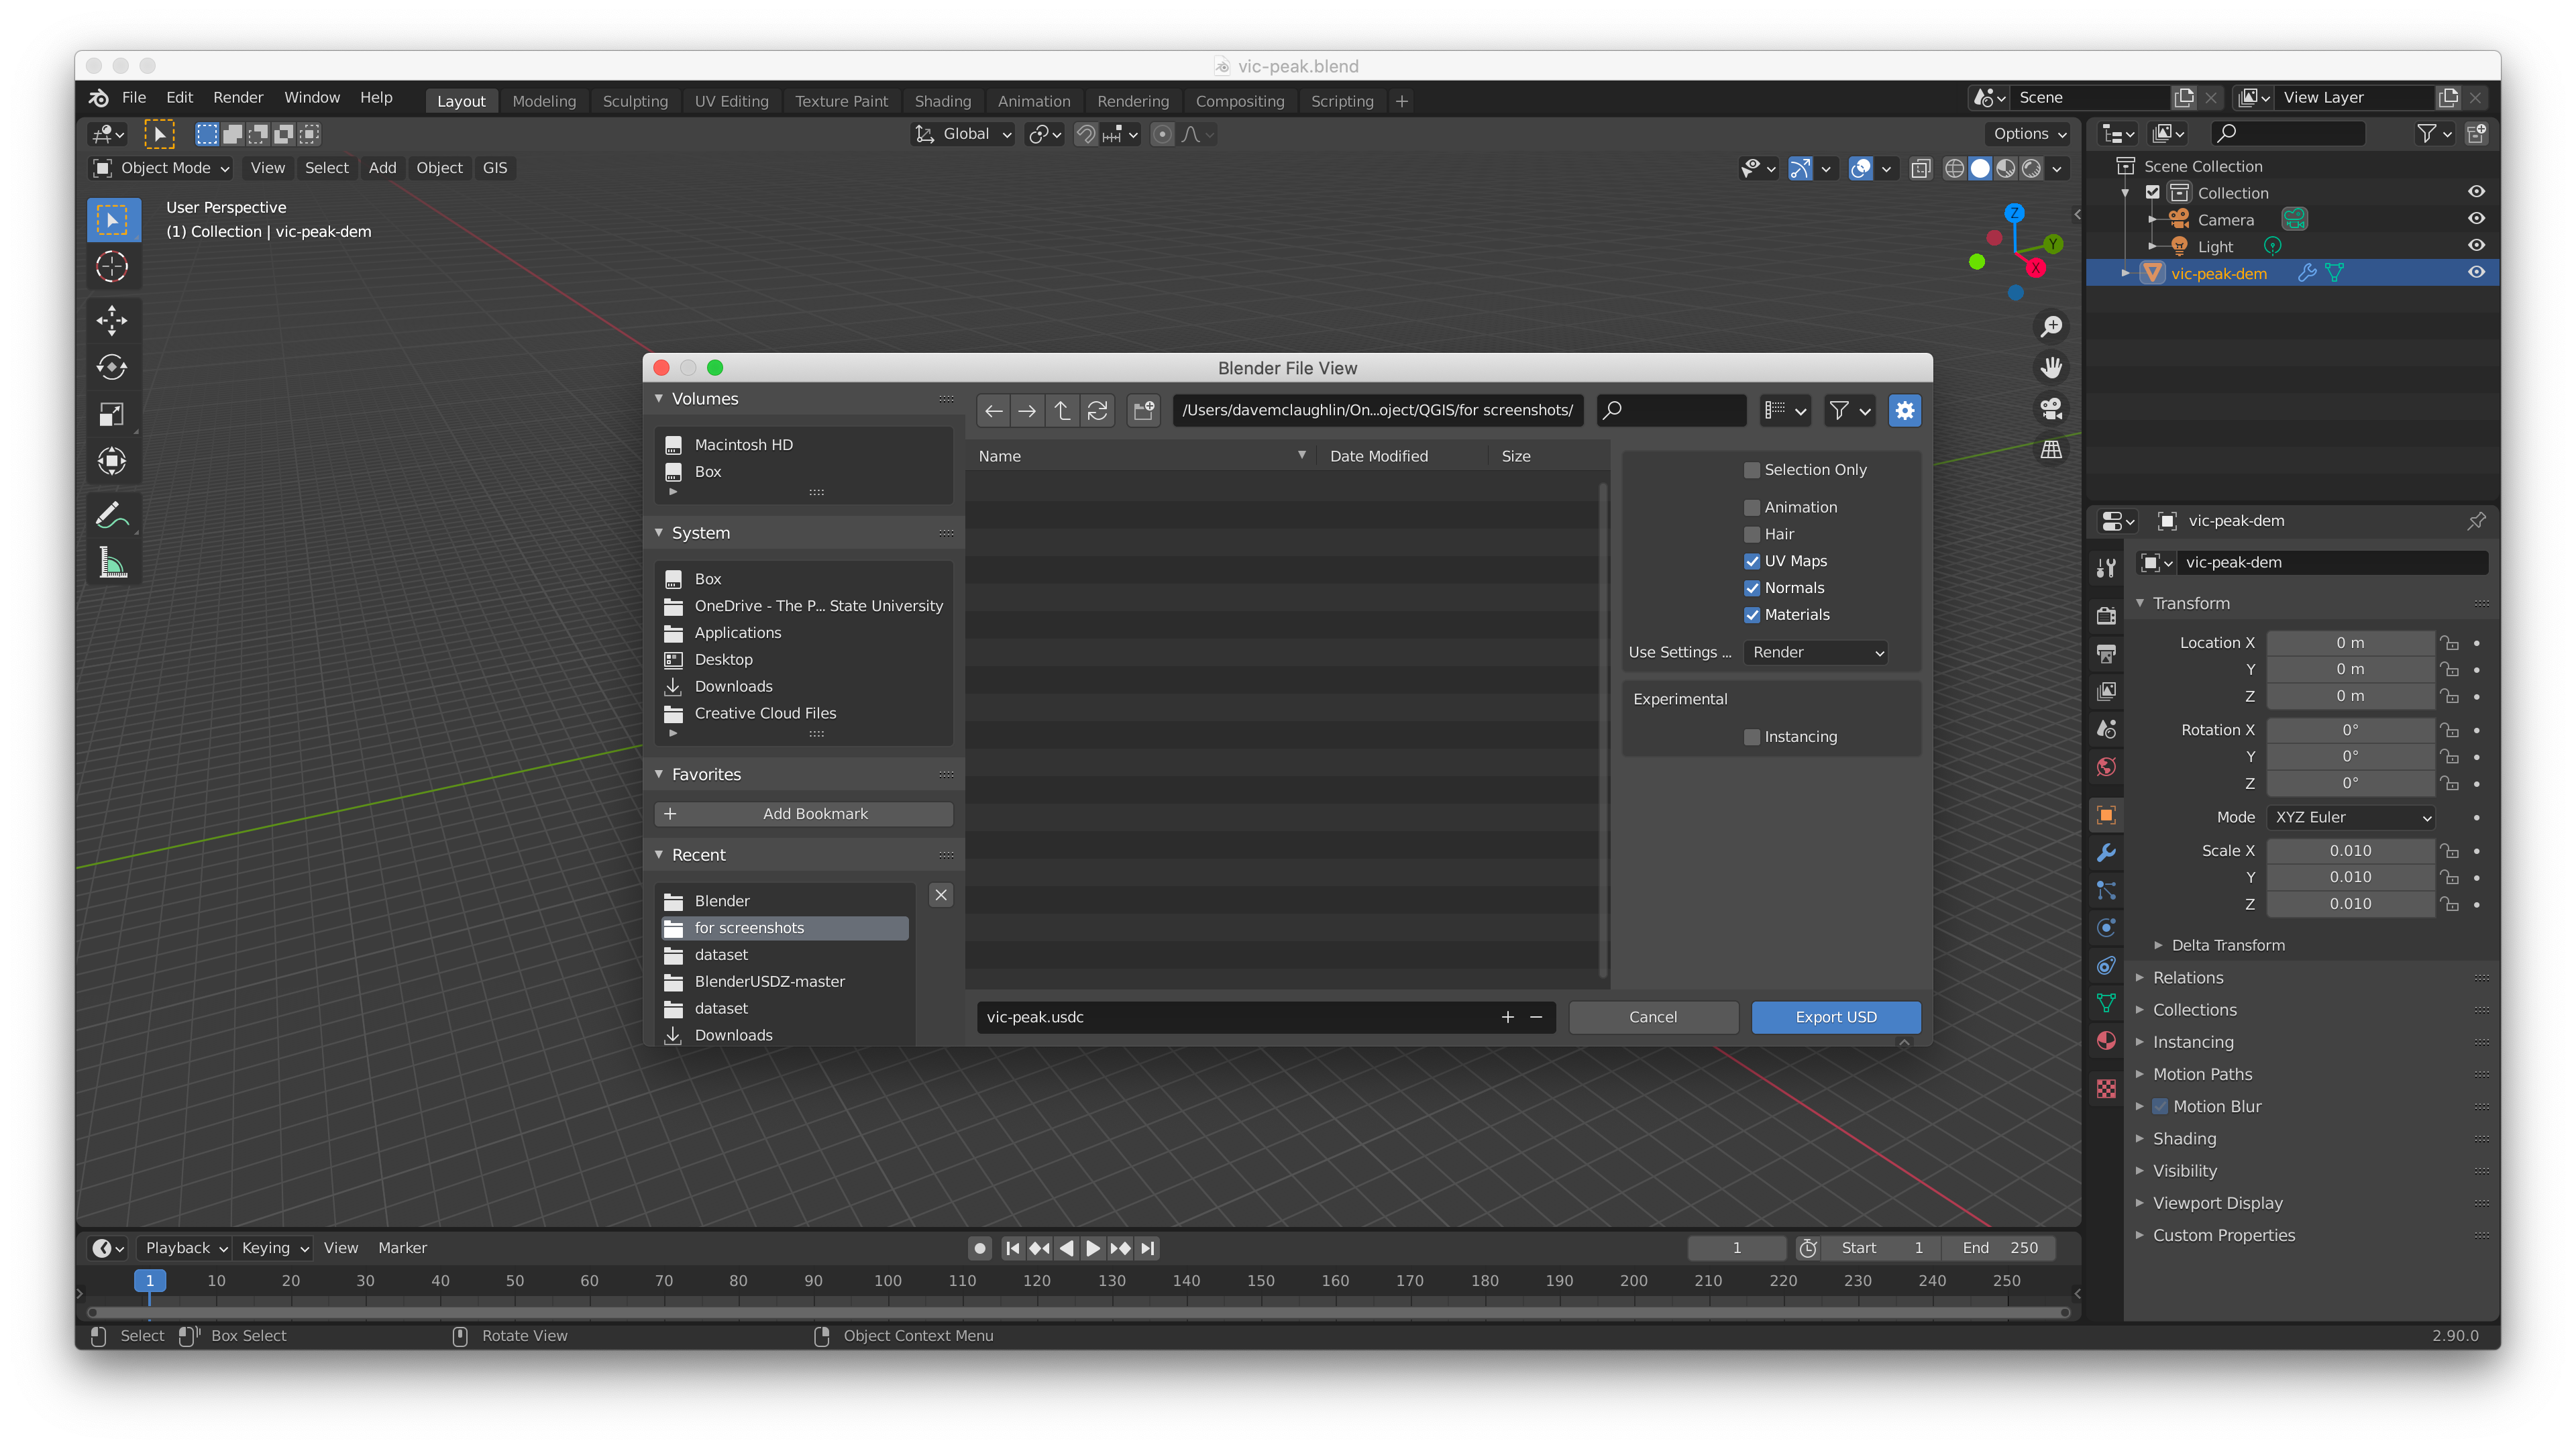
And now we export from Blender as a Universal Scene Description file so that we can move into Xcode.
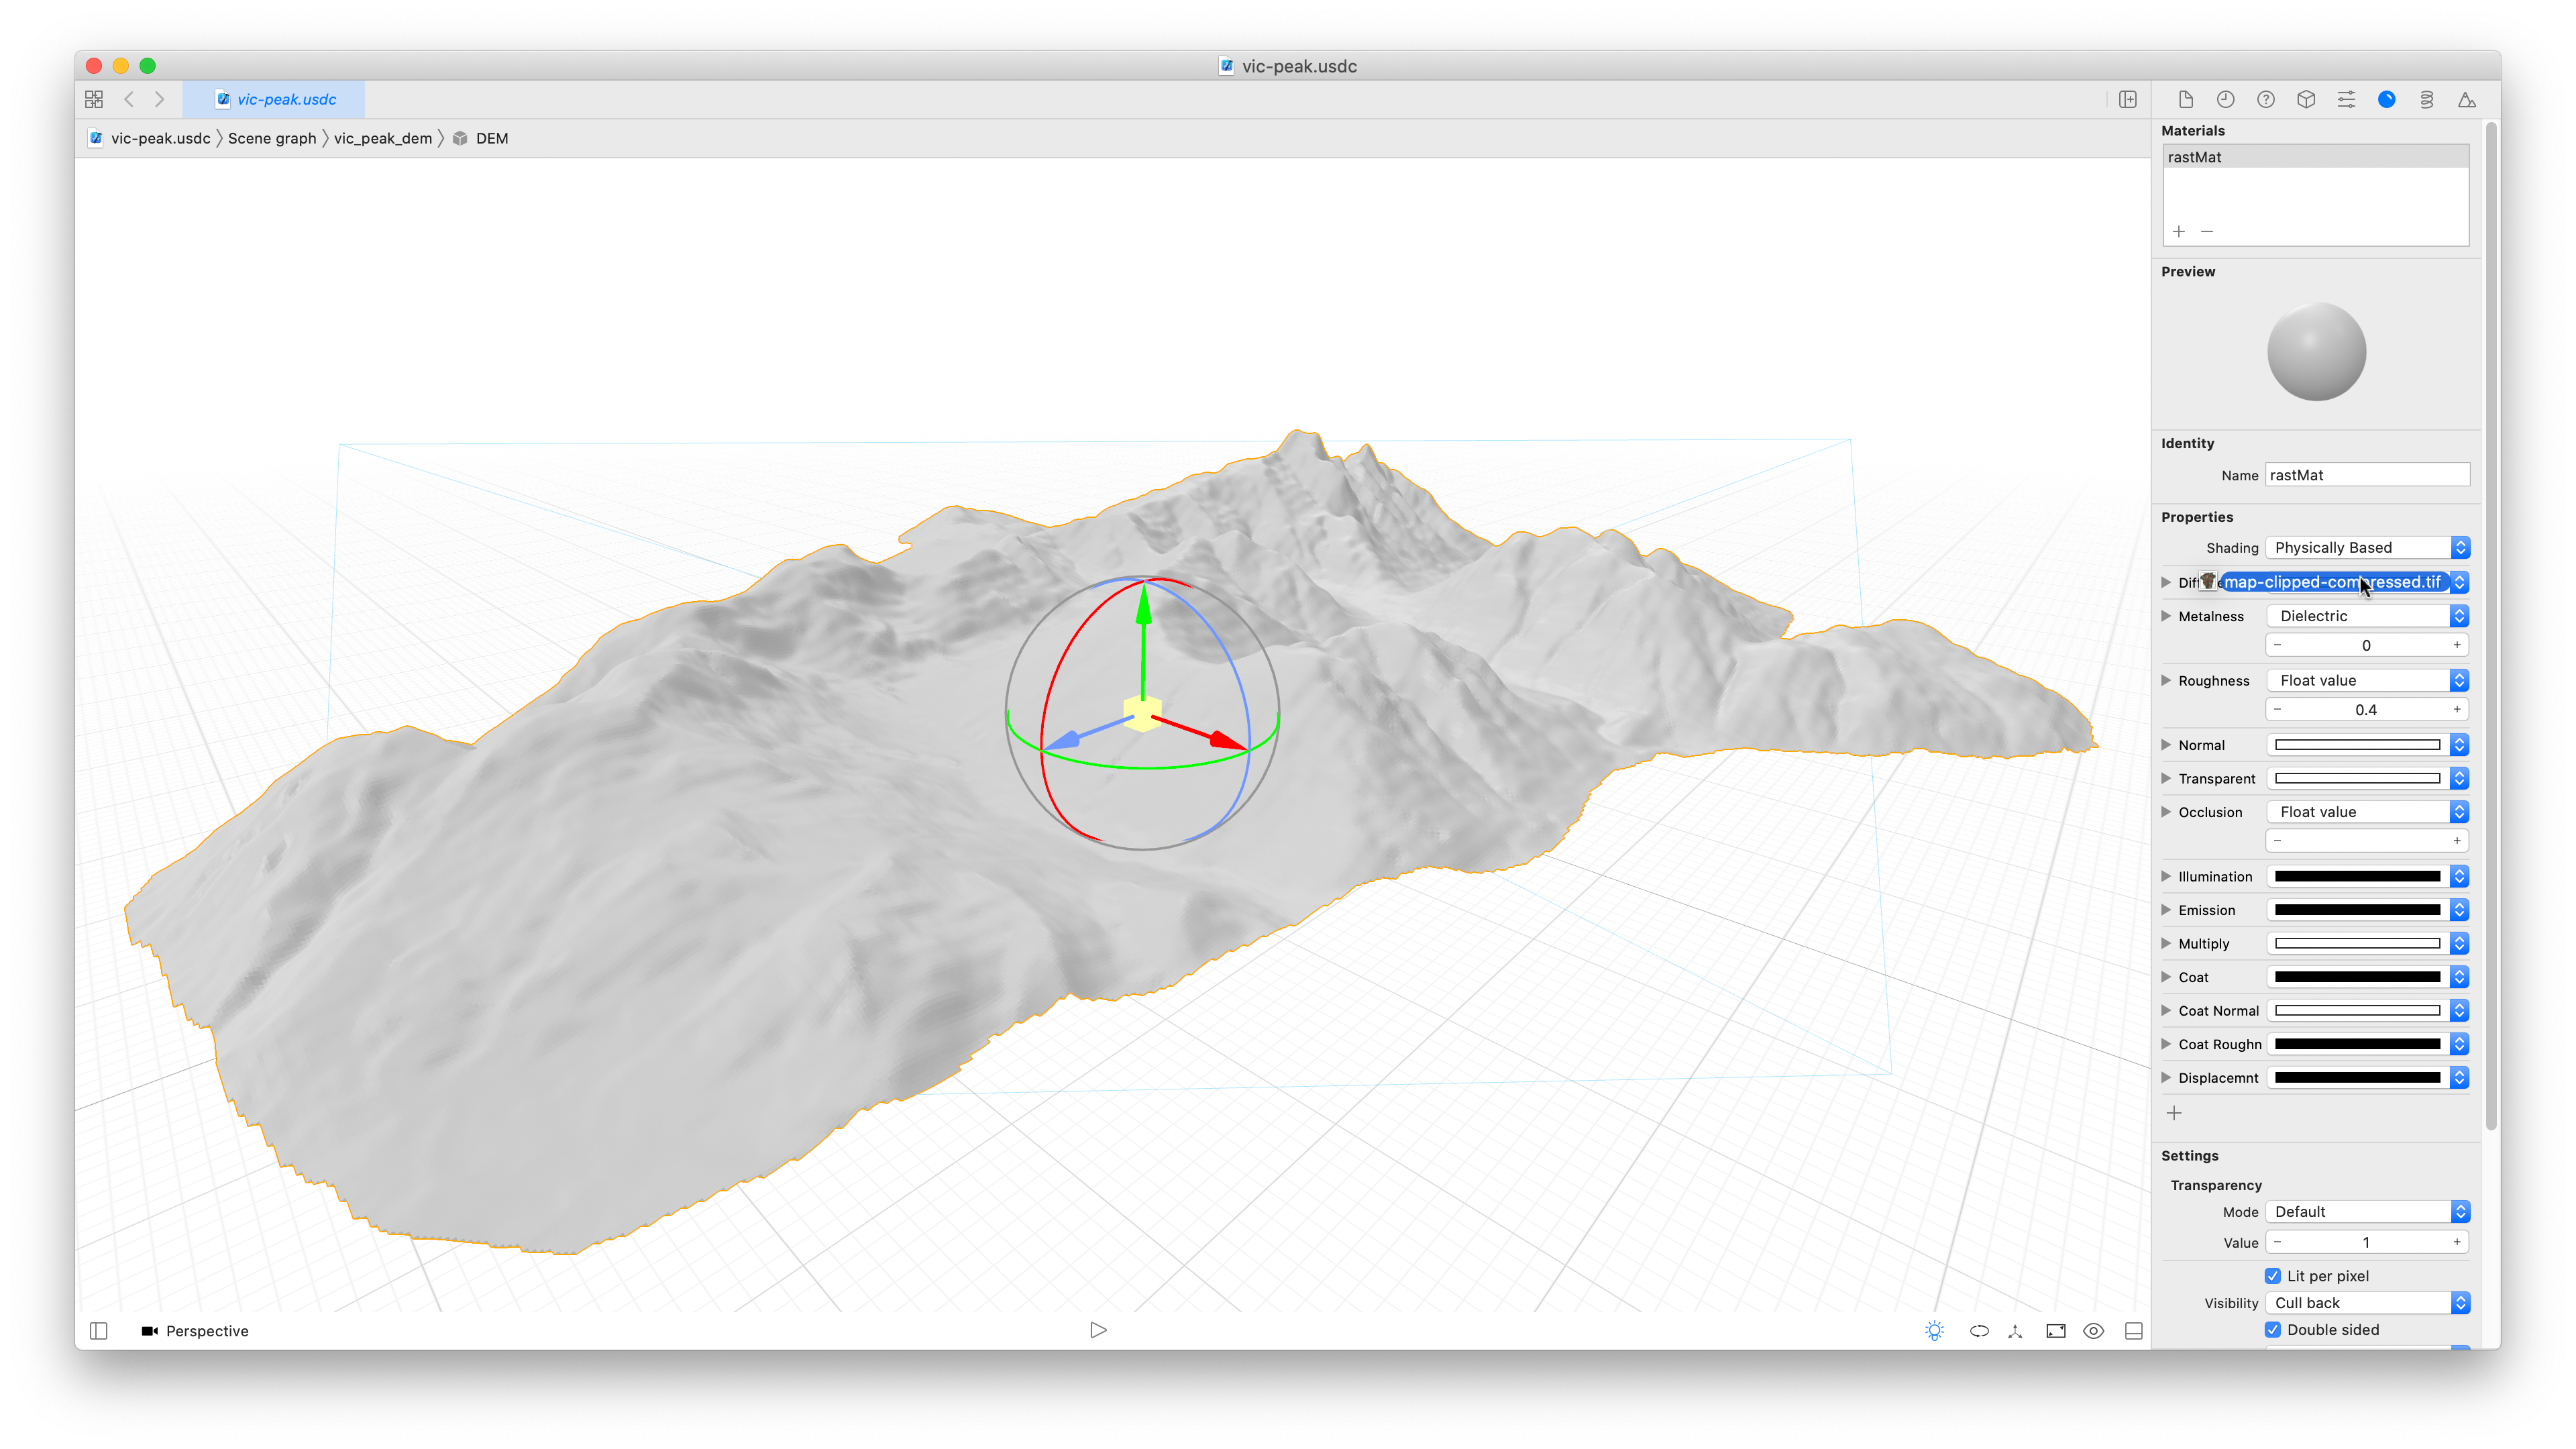
Opening in Xcode
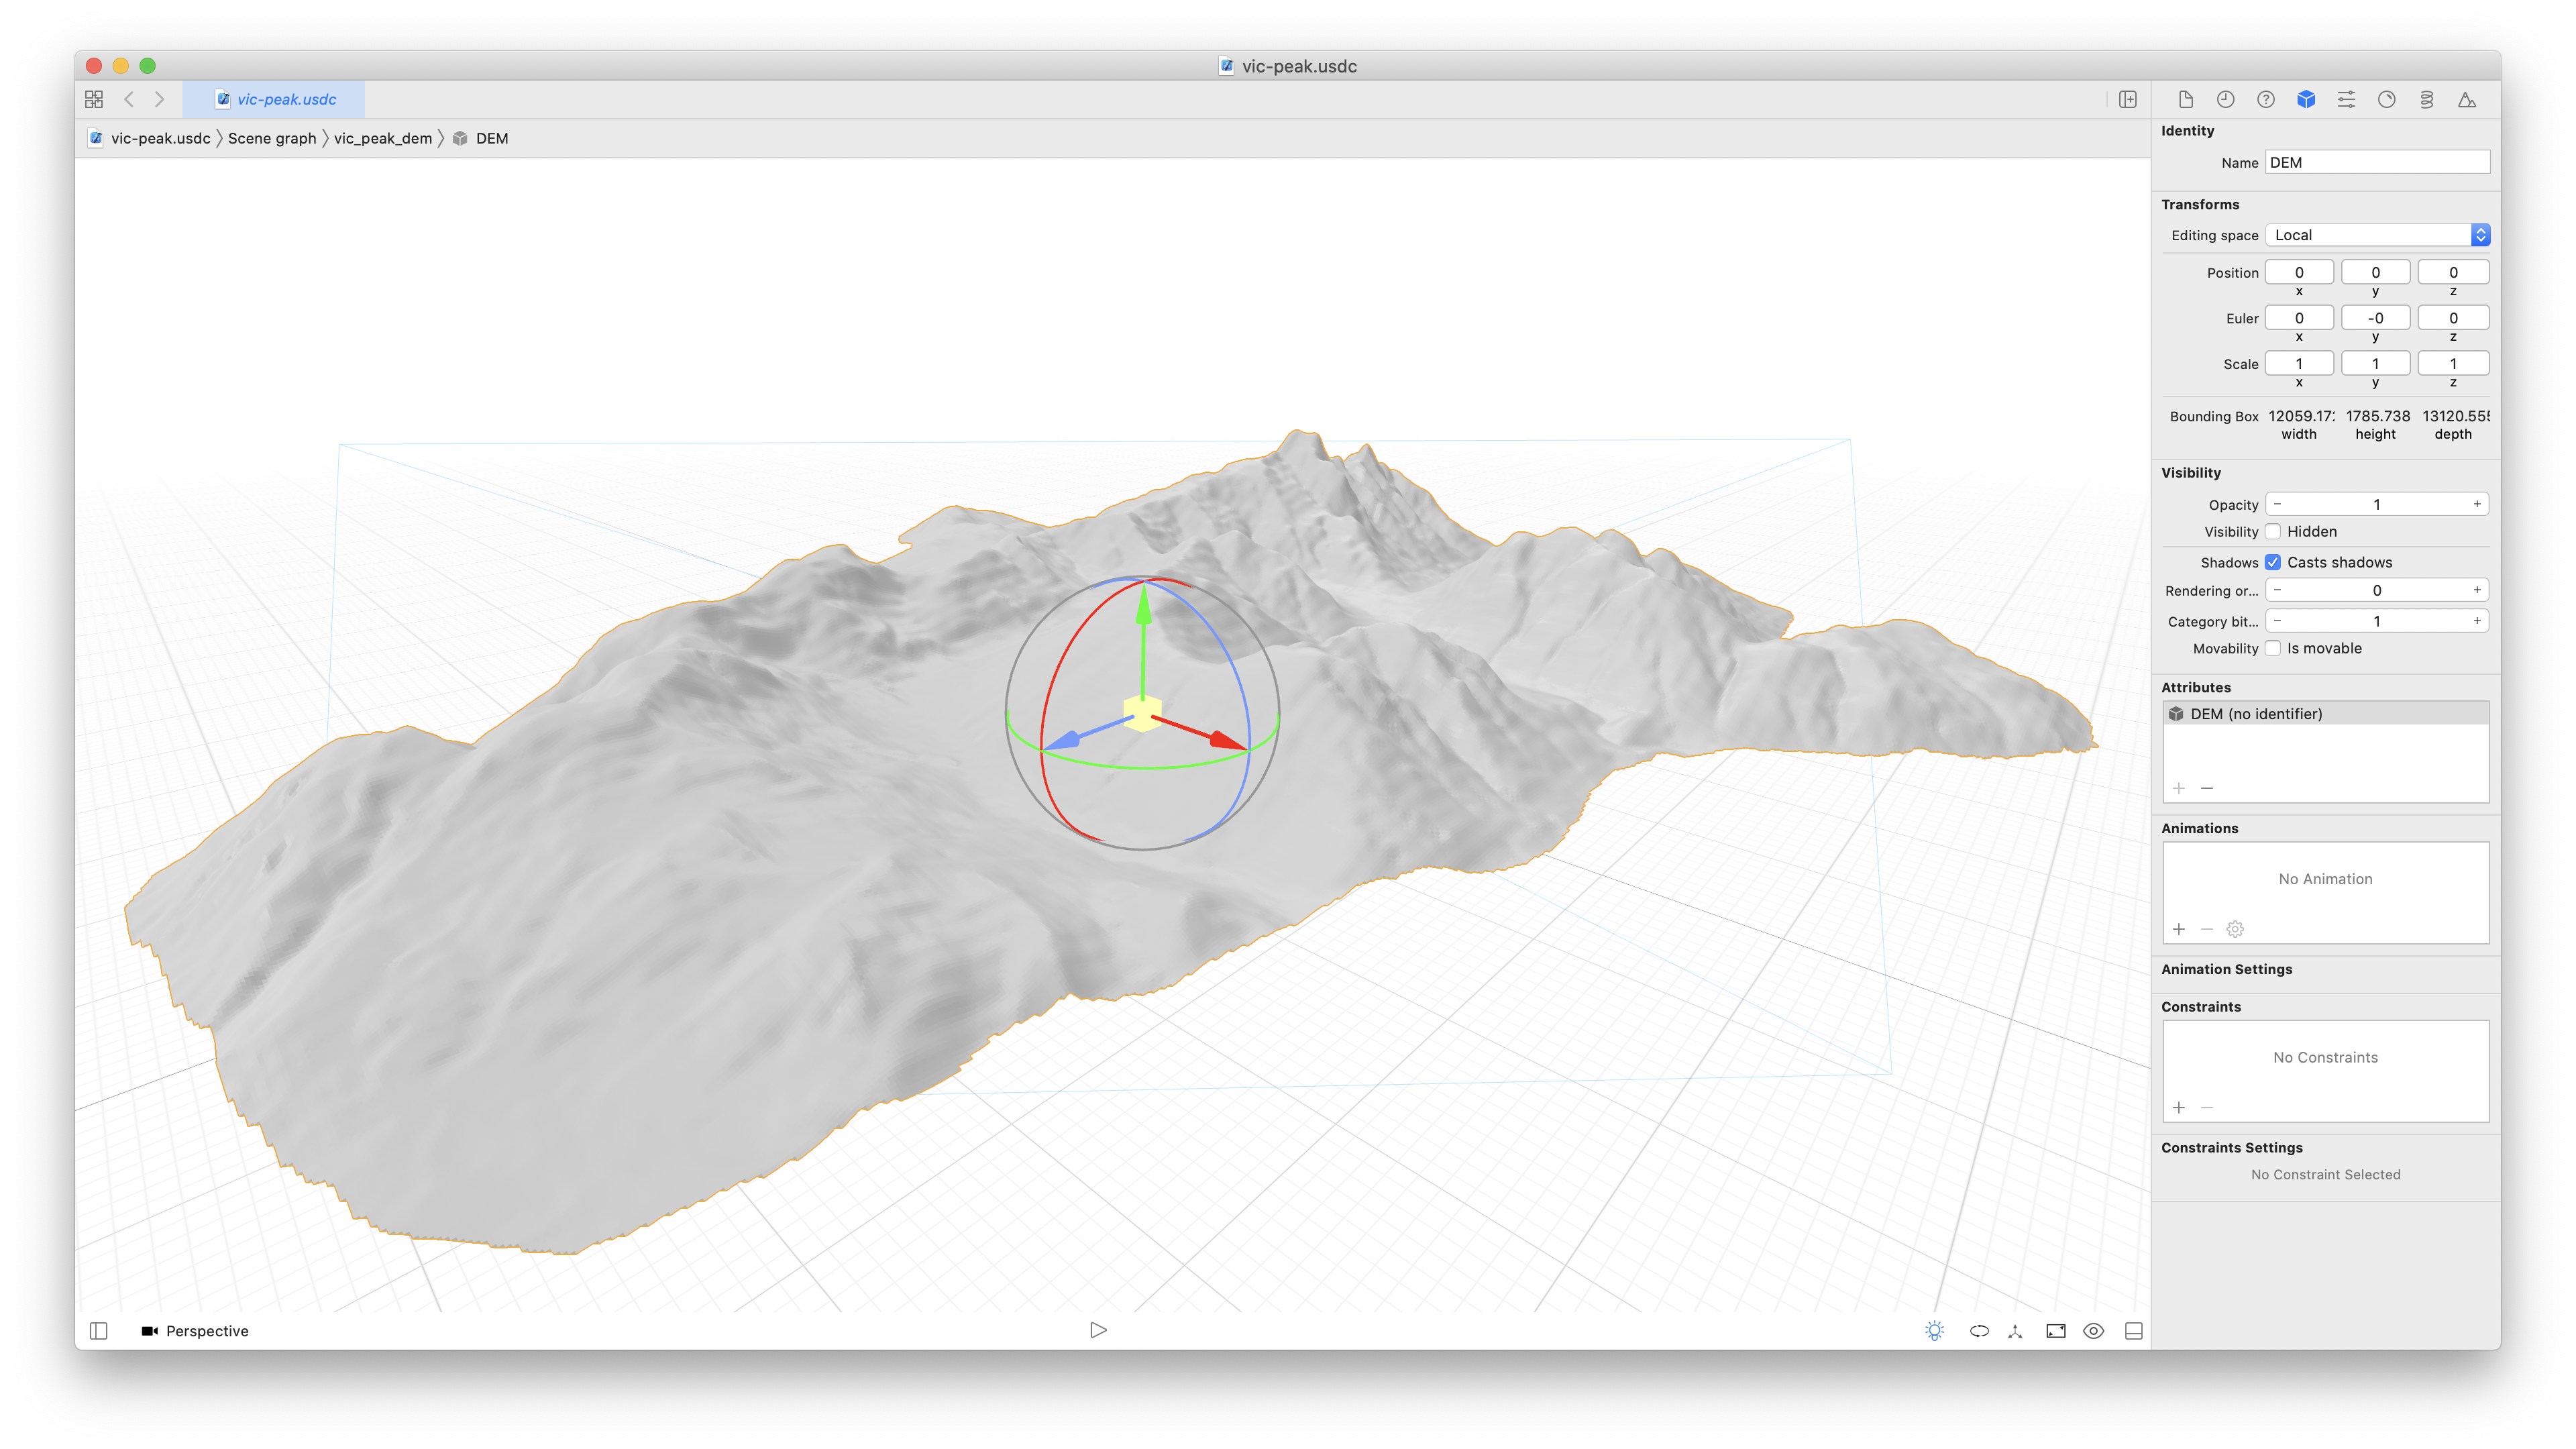
The first thing you’ll notice in Xcode is that we seem to have lost our map, but that’s ok. We’re going to perform one more optimization on our map GeoTIFF before bringing it back onto the model.
Optimizing with JPEG Compression
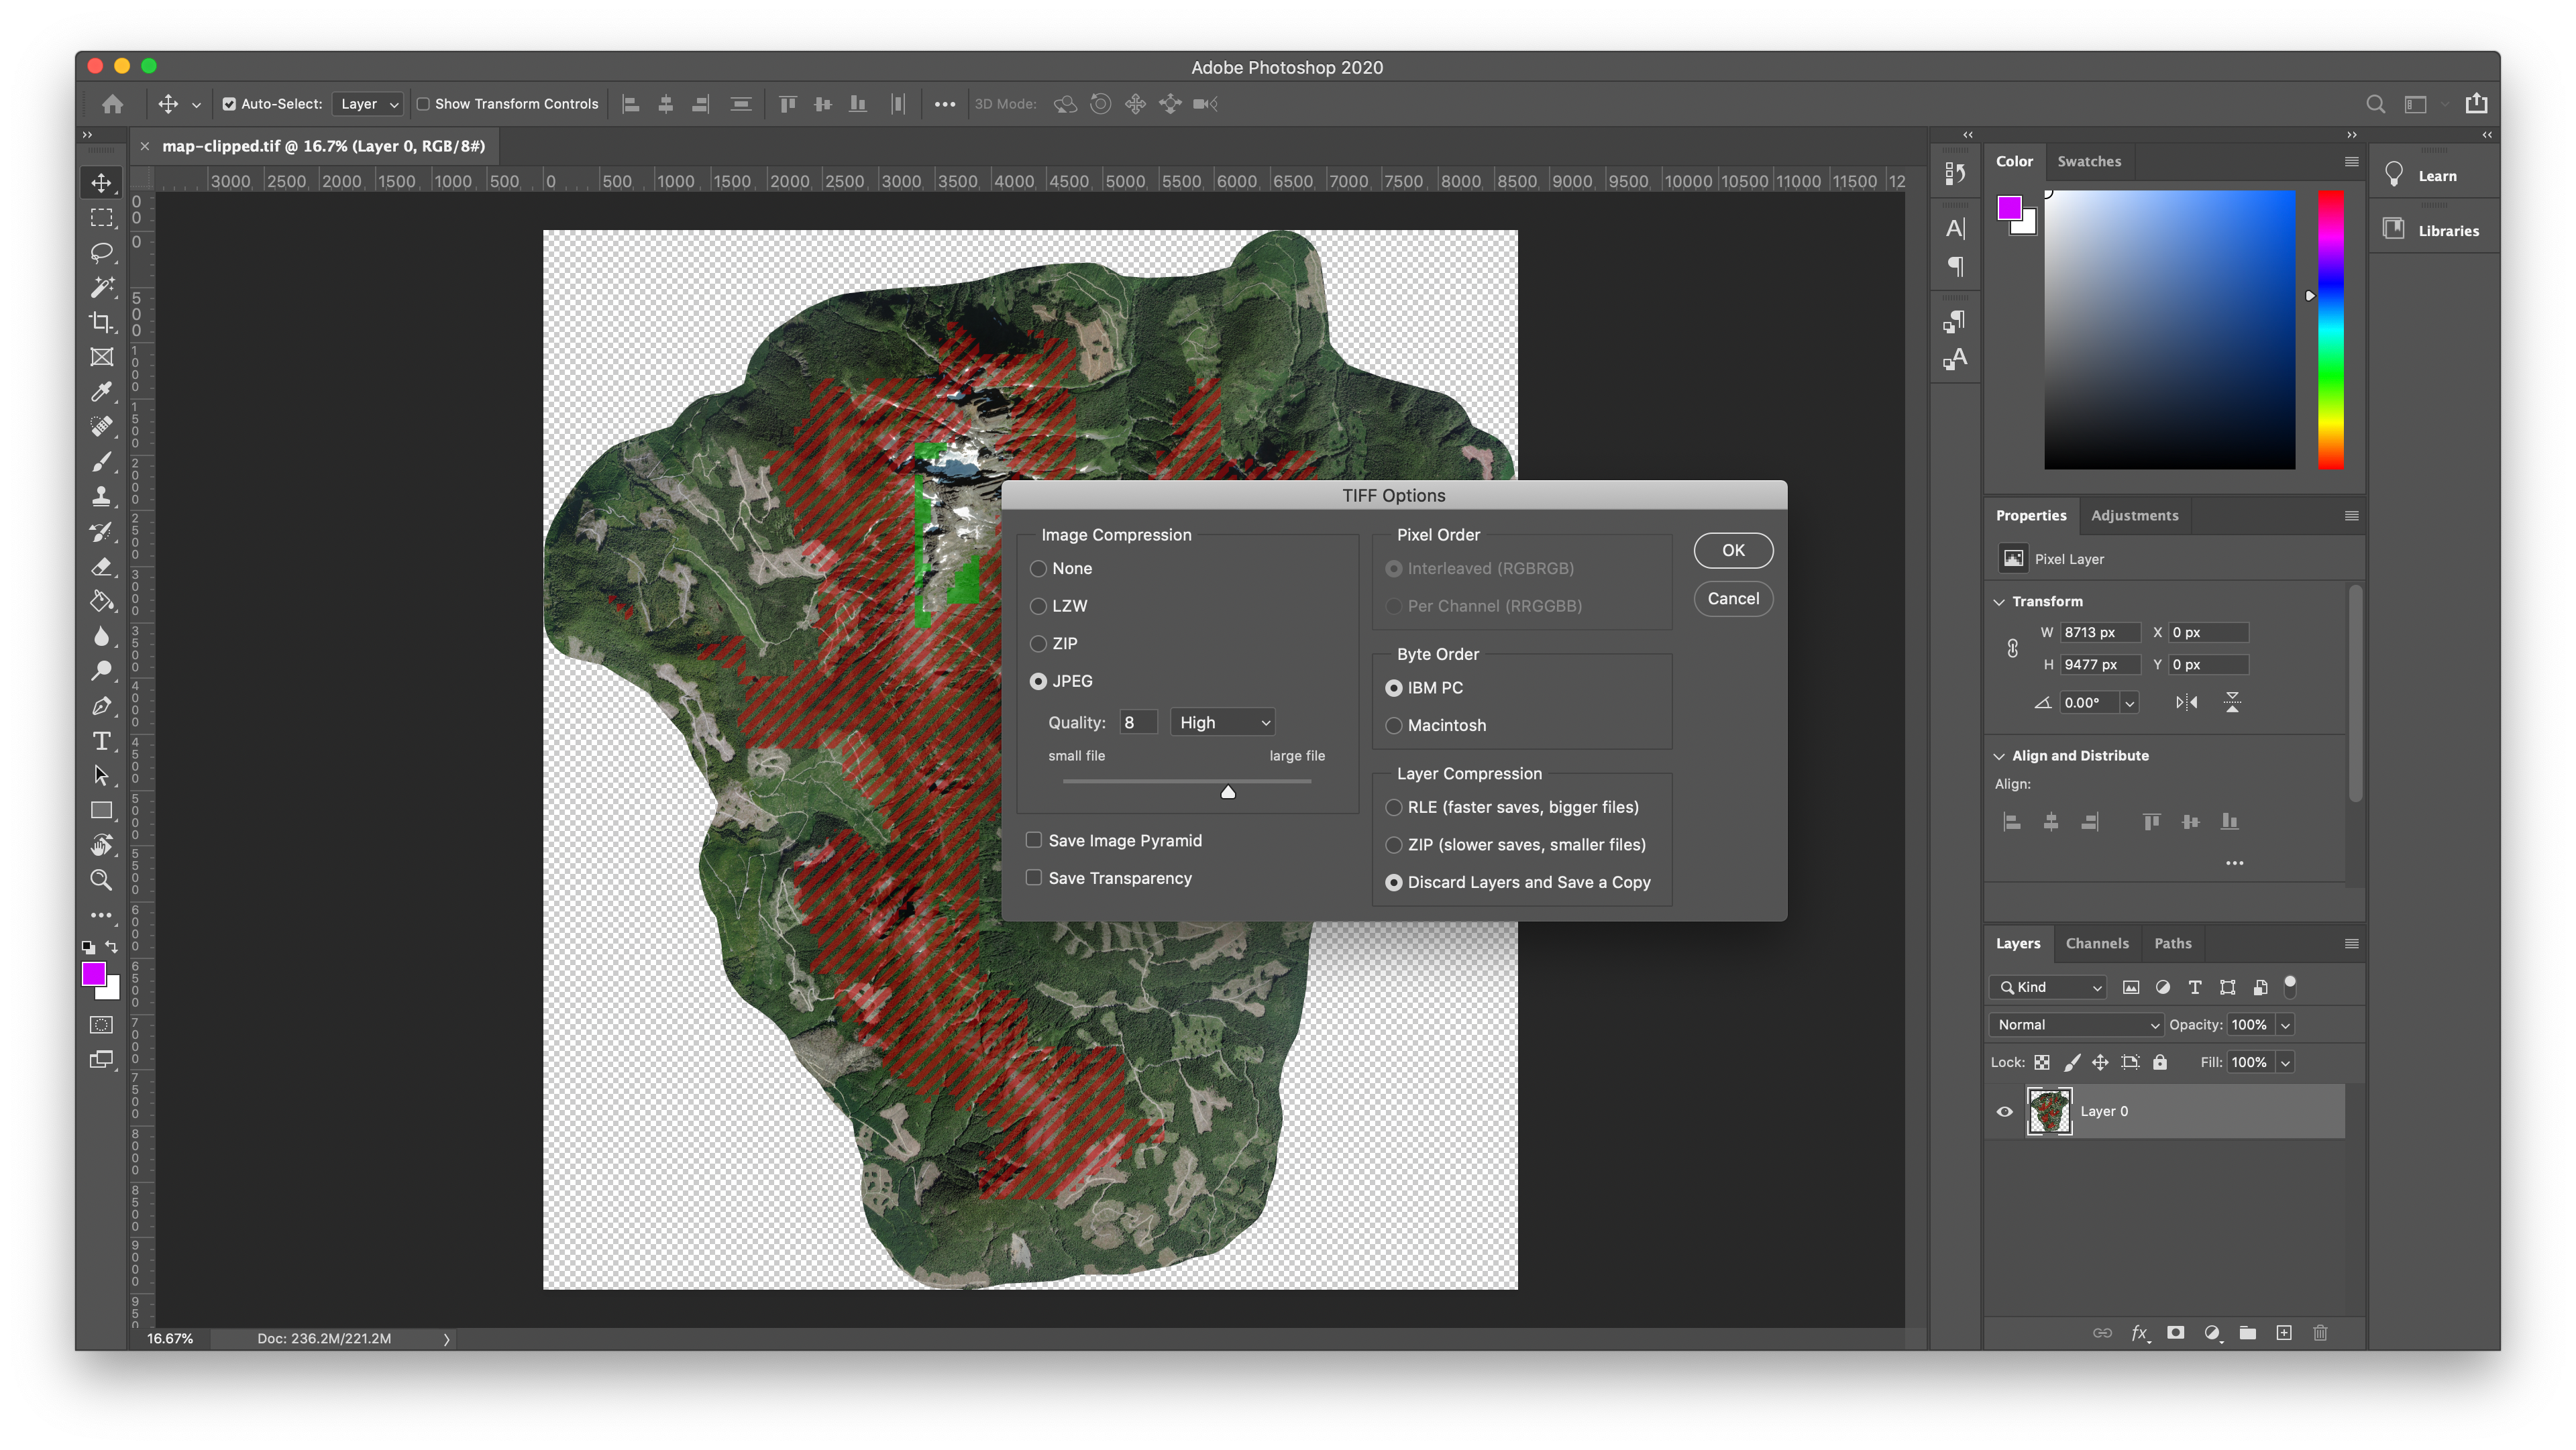
In Photoshop, GDAL, or any other software capable of working with TIFFs, open your clipped map file and resave it using JPEG compression. It’s important that you do this step at this point in the process and not earlier. I couldn’t get the BlenderGIS plugin to successfully read a GeoTIFF with JPEG compression, but we’ll be fine to bring it into Xcode since the model is already set up. We’re going after file savings here, since you may be wishing to share your model across the Internet. With this high-res satellite imagery, I’m able to maintain a high quality file while reducing the size from 330MB to 10MB.
Re-Add the Map as the Material
Now we can jump back to Xcode, select our model, and flip to the Material inspector. From the Finder, drag your newly-compressed TIFF onto the object itself or onto the Diffuse setting, which is currently just a light gray swatch.
That’s Better
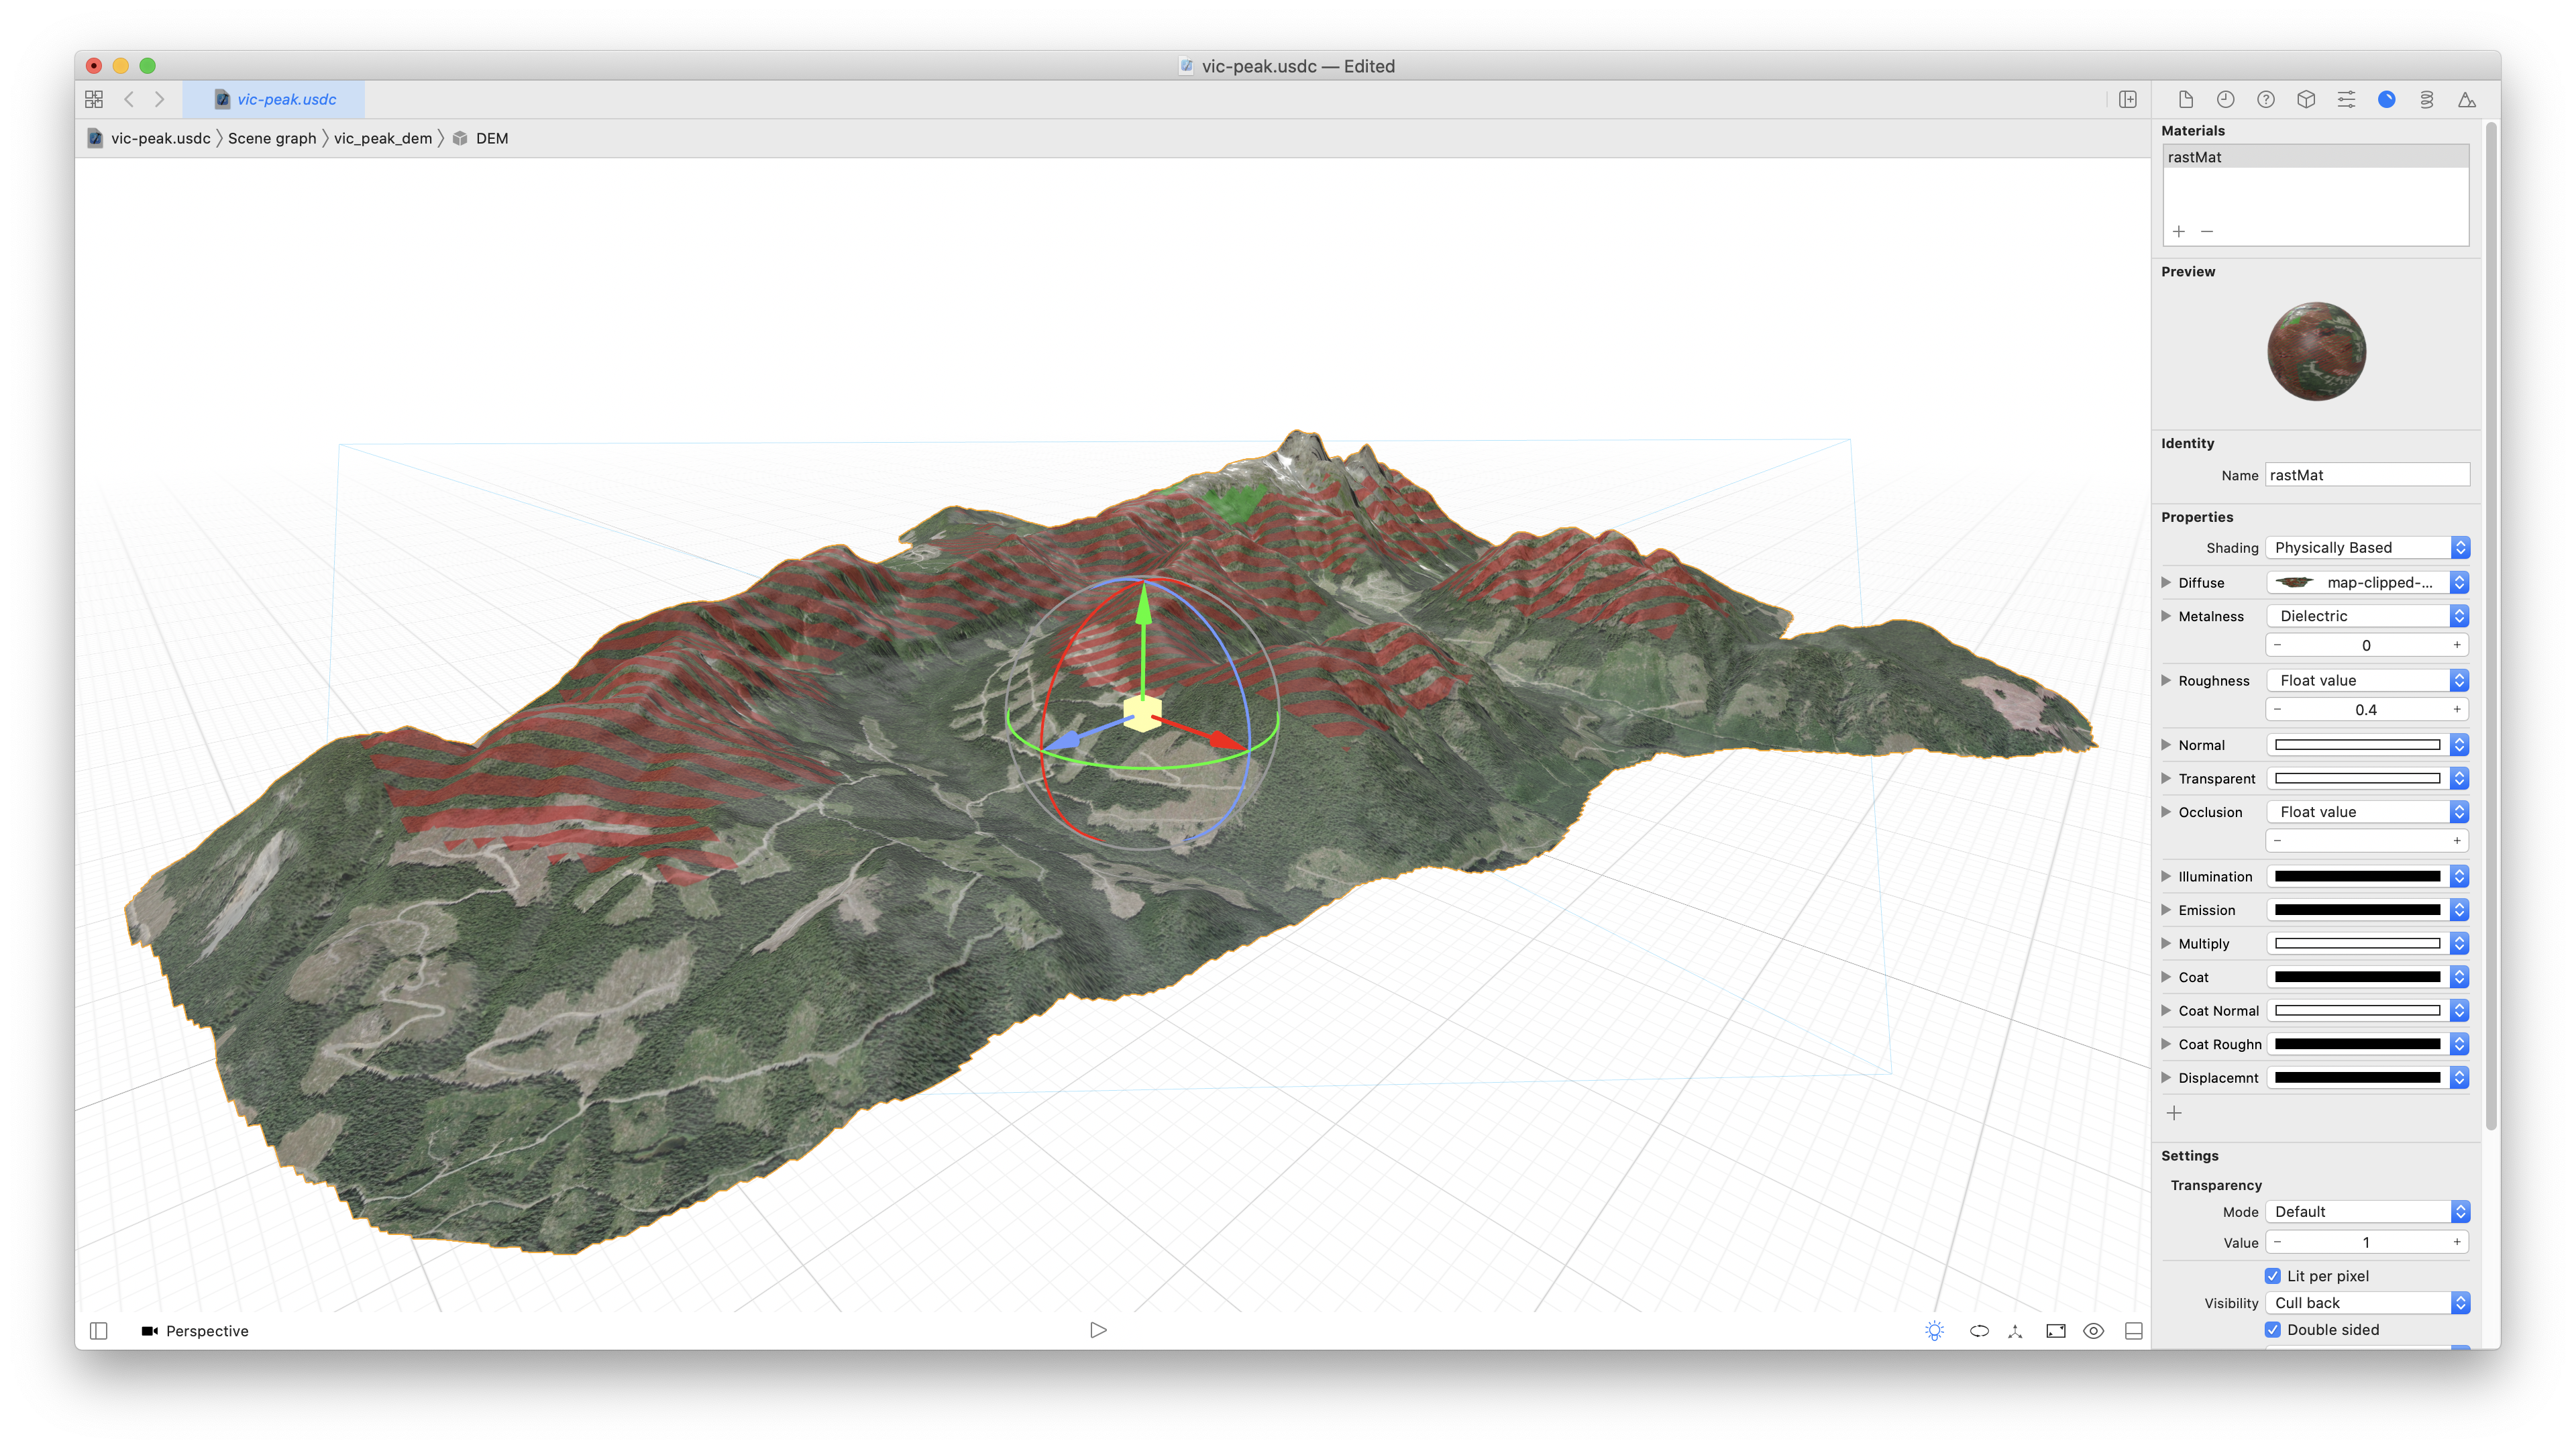
And now we have our optimized map back on the model.
Removing Reflections

Turn the material roughness all the way up to 1 to remove that shine from the model.
Final Scaling and Export
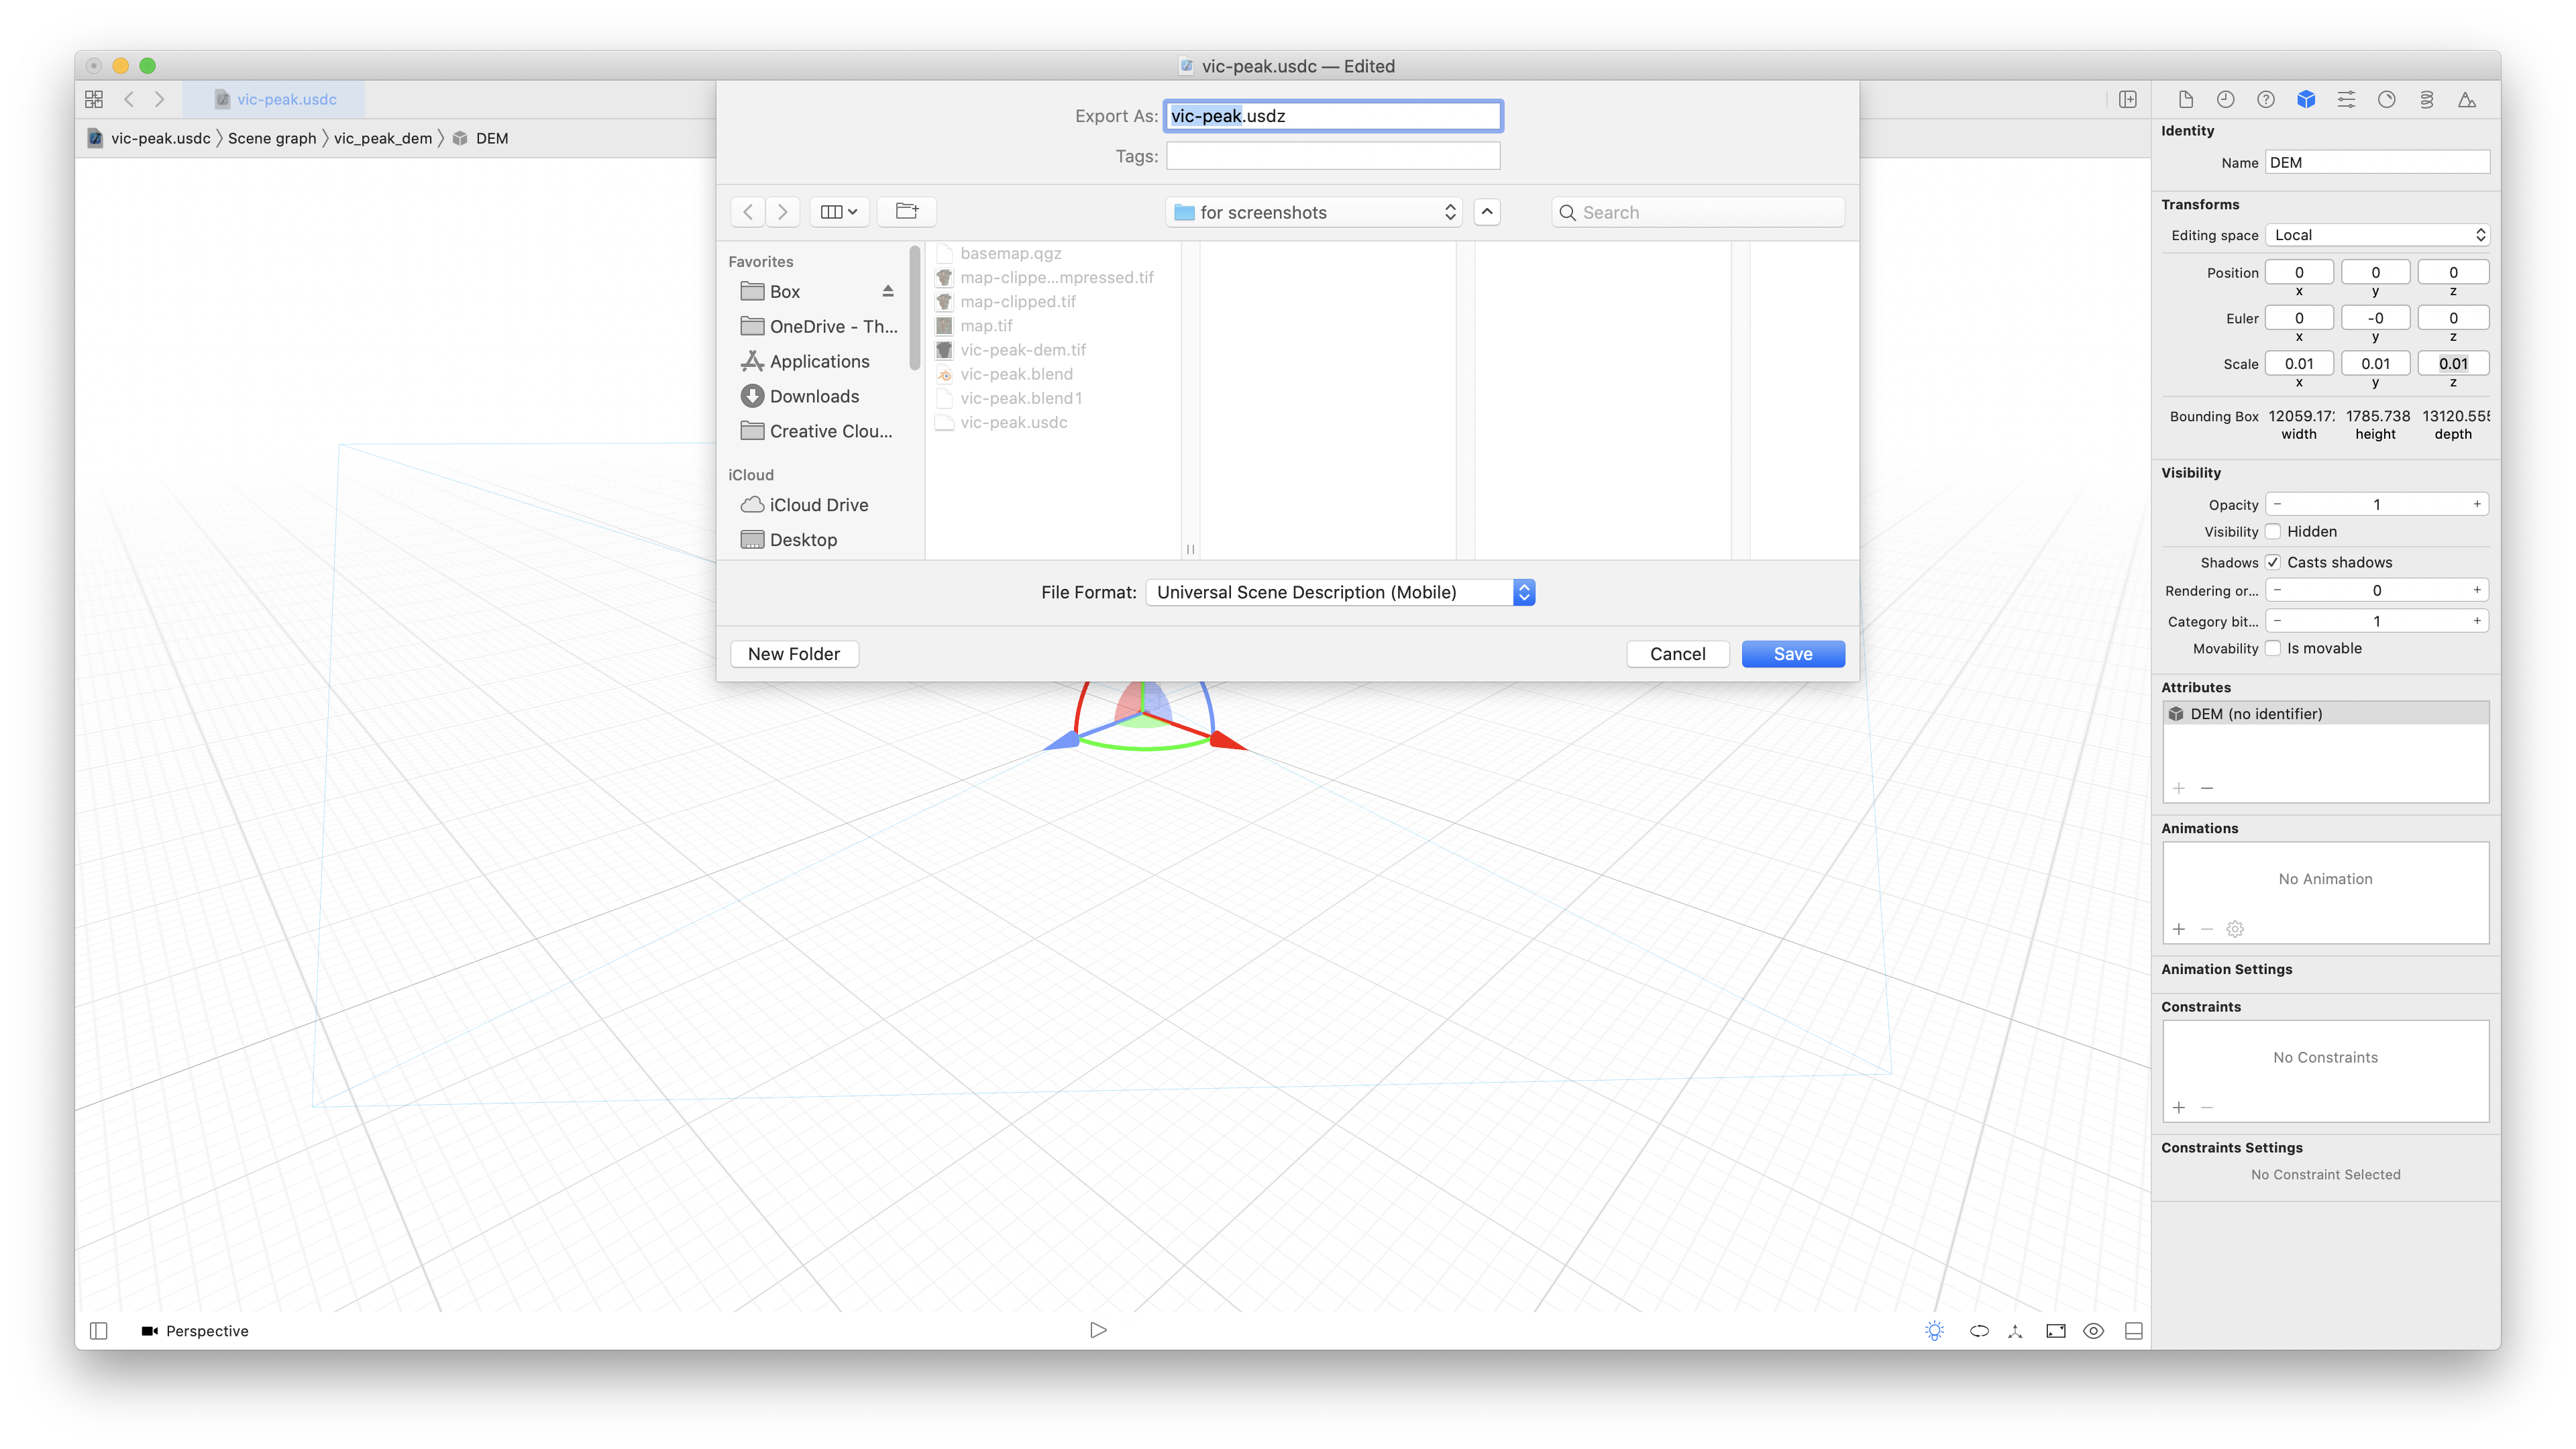
Update the scaling settings here in Xcode to reduce the size of the model again (trial and error to get a good size), and then export as Universal Scene Description Mobile to get the USDZ file that can displayed on mobile devices.
Optional: Embed the Map in a Website
At this point you should have a .usdz file which you can open in Xcode or the Preview app on a Mac, or from any app on an iOS device. You may want to embed it on a website, however. Here’s the HTML syntax to use:
<a href="vic-peak.usdz" rel="ar">
<img src="vic-peak.jpg" alt="A map of Victoria Peak, showing marmot habitat">
</a>
To break that down, we have an image (take a screenshot of your map!) wrapped in a link. The link points to the .usdz file and has a rel attribute of “ar” to help browsers identify what to do with it.
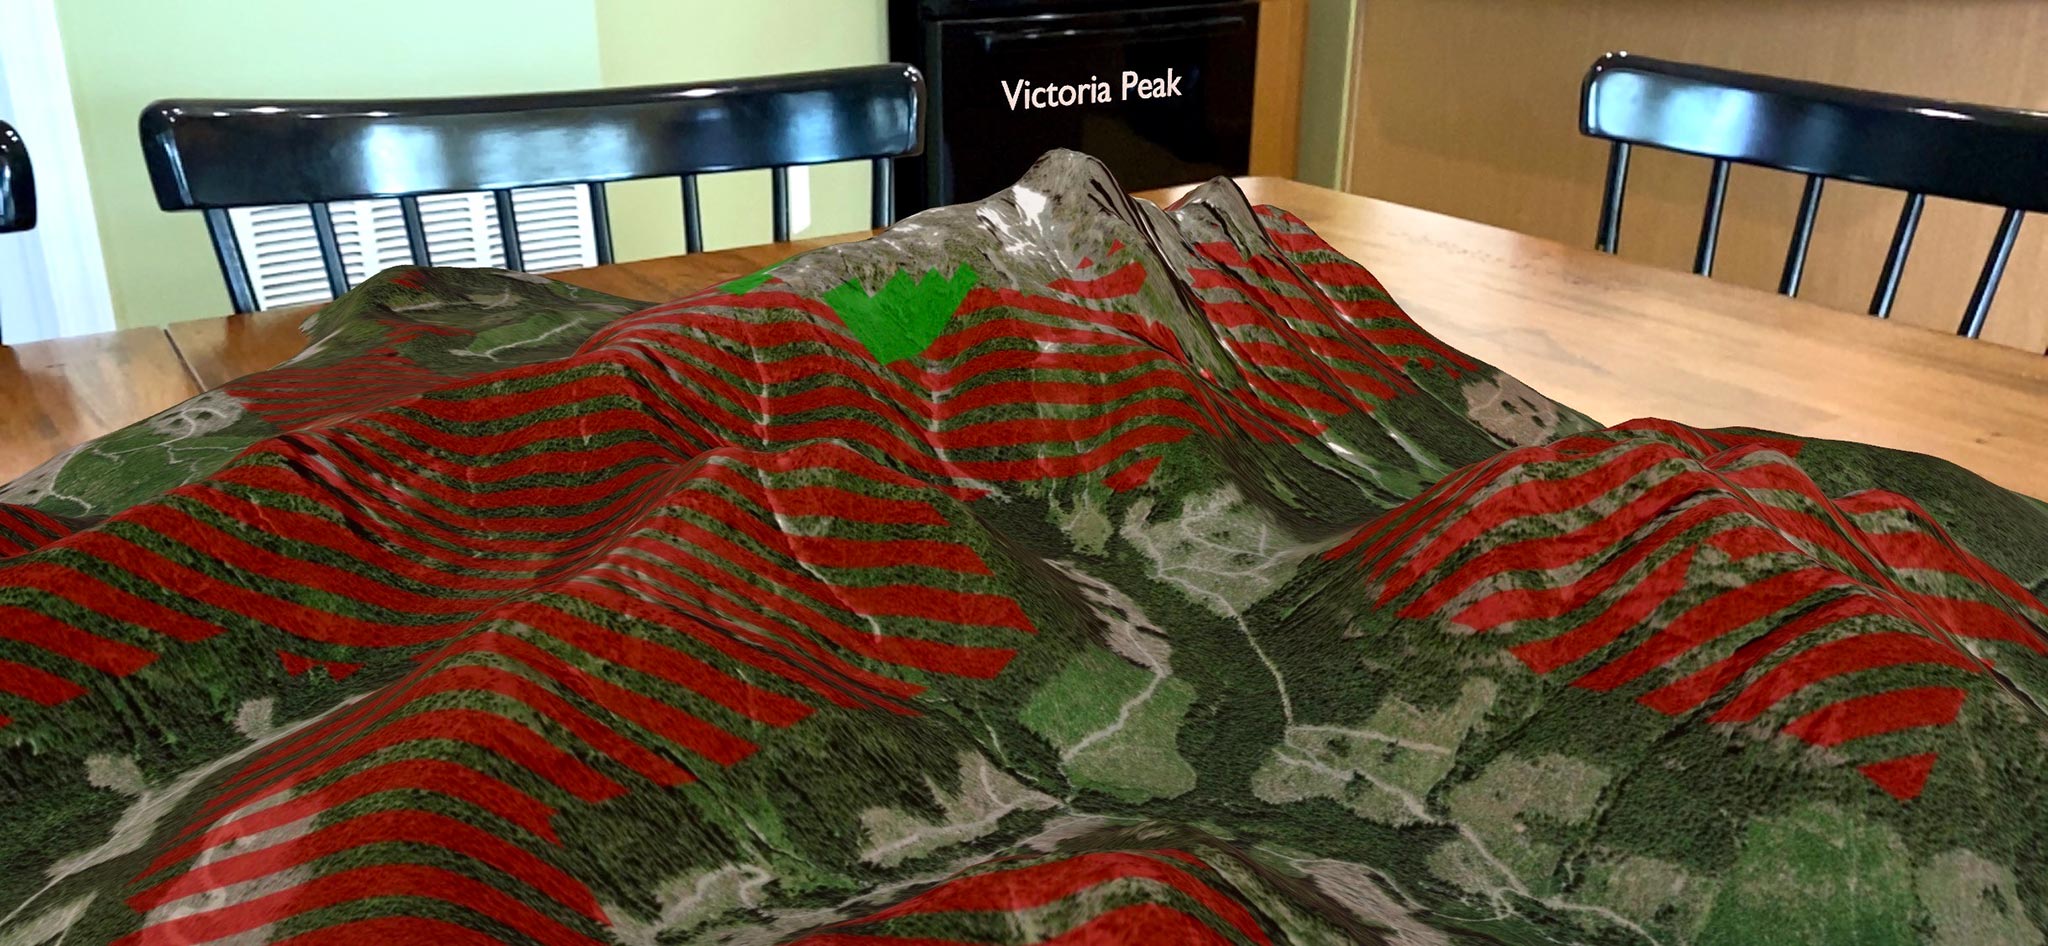
Video Demo
In the video below, I demo the model of Victoria Peak’s changing marmot habitat that I created in the screenshots of this step-by-step guide. Note that I also added a 3D text label for the mountain in Blender, which I didn’t include in the walkthrough.